
A Fedora Installation with an openSUSE Style Btrfs Subvolume Layout and Snapper Intergration for System Snapshots and Rollbacks
Published: March 11, 2024, 6 a.m.
Updated: March 28, 2024, 6 p.m.
Fedora, in recent releases has used the next generation Btrfs filesystem by default for new installations. Unfortunately, a default installation of Fedora, or Fedora based distributions which closely follow Fedora, such as Ultramarine Linux, do not create a Btrfs subvolume layout which allows some of its advanced snapshotting and rollback features to be used easily -- without requiring Btrfs commandns to be issued from an external system, or to allow snapshot and rollback management utilities, such as Snapper to be easily integrated into the system.
This article describes a process in which Fedora's Anaconda installer is used in a live ISO environment to install Fedora on a basic subvolume layout, and then from within the live ISO environment, modify the subvolume layout and other system configuration items so that it conforms to the openSUSE style of subvolume layout. The process also includes full integration of the Snapper utility, as well as automatic snapshot creation at package management transactions with a Snapper DNF plugin, and inclusion of a GRUB submenu which lists available read-only snapshots in which the system can be booted in order to easily initiate a rollback.
Introduction
The Btrfs filesystem is believed by some to be the next default filesystem for Linux, replacing the current de-facto standard filesystem, ext4, used by default in most distributions. It has many advanced features which are not available in the current standard filesystem, such as copy-on-write capability which maintains a version of a file at each modification. This allows individual files to be rolled back to previous versions and even the entire system to be snapshotted and rolled back to a previous state from a snapshot. Also, among other features that make it increasingly in demand by data centers, it is fault tolerant -- not only at the device level but to an individual file level, able te repair corrupted files -- as long as the required number of redundant storage devices are available and configured appropriately.
Fedora, a serious distribution, highly regarded as a development platform, unlike its corporate sponsor, has embraced the innovative next generation filesystem, using it by default in recent releases. Unfortunately, a default installation of Fedora, or distributions based on Fedora, such as the distribution used as a reference in this article -- Ultramarine Linux, reviewed in Ultramarine Linux 39 Review [KDE Plasma Edition] -- do not configure a subvolume layout which allows the Btrfs filesystem's snapshotting and rollback features to be used easily, or integrate with the Snapper utility, which simplifies snapshot and rollback management by, for example, precluding the necessity of performing rollbacks from an external system. Anaconda, Fedors's installer, simply creates the main top-level subvolume (subvolid=5, subvolume=/) as part of the filesystem formatting, and simply writes the system image to this subvolume.
In order to take advantage of Snapper capability an additional subvolume under the subvolume mounted to the root of the filesystem hierarchy standard is required for containing snapshots in a specific hierarchy (as we will see). In fact, the pioneer of Btrfs, openSUSE creates a subvolume @ under the main subvolume to contain all other subvolumes including one for the series of snapshots and other subvolumes used to contain filesystem hierarchy paths which should be excluded from snapshots.
Even the Blivet-GUI advanced partitioning program included in the Anaconda installer is not flexible enough to allow users to create appropriate subvolumes for a layout that is suitable for use with Snapper. After all partitioning parameters are entered, when activated during installation, it creates the subvolumes in the reverse order from the entered order. It also assigns mountpoints to each subvolume immediately after it is created and not after all subvolumes have been created. Because of these Blivet-GUI idiosyncrasies, it is impossible to create nested subvolumes in the openSUSE way which some users may prefer and is required by Snapper for the snapshots subvolume. It will, however, allow a single subvolume to be created under the main subvolume and mounted as an installation target.
This article describes a process performed from within the live ISO environment immediately after the installer finishes to reproduce the openSUSE subvolume layout, install and configure Snapper, install a DNF plugin to automate snapshot creation before and after package management transactions, and install and configure grub-btrfs to include a submenu of bootable snapshots in the main GRUB menu. The following image shows the final subvolume layout after the process, and for comparison, the subvolume layout of a default Fedora Btrfs installation and a minimal subvolume layout of a Fedora installation in which a single subvolume under the top-level subvolume is created for mounting at /. This minimal subvolume layout installation is used as a starting point for the process described in this article.
The Subvolume Layout of a Default Fedora Installation, a Minimal Subvolume Layout and the Final Subvolume Layout and Mounts of the Process Described in this Article
On the right is the final subvolume layout and mounts after the process described in this article is completed. On the top left is the subvolume layout of a default Fedora installation. On the bottom left is the subvolume layout immediately after a Fedora installation by Anaaconda in which a simple subvolume layout is created, but not the bare minimum normally created by Anaconda by default. From this initial starting point modifications are made from withing the live ISO environment and after rebooting to bring it to the state shown at the right of the image.
The process is summarized below:
-
Part 1: Install, Creating Simple Btrfs Subvolume Layout
Install with Anaconda, creating a Btrfs partition for the root filesystem hierarchy with a subvolume under the top-level subvolume. Create another Btrfs partition for the filesystem hierarchy under /home with a subvolume under the top level subvolume. Assign the mountpoints / and /home to the lower level subvolumes as installation targets. -
Part 2: chroot to Install and Initialize Snapper
Via a chroot from the live ISO environment to the installed system, install Snapper. Initialize a Snapper confguration for snapshots of the filesystem hierarchy mounted at / named "root". The initialization will automatically create the necessary snapshots subvolume. -
Part 3: Create Initial Snapshot Subvolume and Subvolumes for Filesystem Hierarchy Paths to Be Excluded from Snapshots
Still in the chroot environment,create the initial snapshot subvolume which will contain the root filesystem hierarchy by the end of the process. Also, create the subvolumes which will contain the parts of the filesystem hierarchy which should be excluded from system snapshots. -
Part 4: Move Original Subvolume Contents to New Subvolumes
Move the contents of the original subvolume mounted at / during installation to the new initial snapshot subvolume. Then move the parts of the filesystem hierarchy that should be excluded from system snapshots to their own respective subvolumes. -
Part 5: Modify /etc/fstab
Modify /etc/fstab to remove the subvolume identifier in the mount options for the / entry, and to add entries for the snapshots subvolume and the subvolumes that will contain the parts of the filesystem hierarchy that will be exclued from system snapshots. -
Part 6: Modify SELinux Mode
Modify the default SELinux operating mode to "permissive" by editing its configuration file. -
Part 7: Set the Default Subvolume
Change the default Btrfs subvolume from the top-level subvolume, as set during the creation of the partition format, to the initial snapshot subvolume, allowing it to be mounted at / without the subvolume identifier in the mount options for the / entry in /etc/fstab. -
Part 8: chroot Again and Modify the GRUB Configuration
Modify the default GRUB configuration to disable GRUB BLS (BLS is a method that uses platform independent drop-in scriptlets in the GRUB configuration in order to standardize GRUB configuration for disparate platforms ranging from s390 t0 x86_64). -
Part 9: Install Snapper DNF Plugin
Install the Snapper DNF plugin which allows automatic creation of pre-transaction and post-transaction snapshots of the system during DNF package management operations. -
Part 10: Install and Configure grub-btrfs
Manually install grub-btrfs by cloning its GitHub repository and using its Makefile, first modifying the included configuration template for compatibility with Fedora. -
Part 11: Final Configuration
Finally, configure minor aspects of the system, such as installing the Btrfs Assistant GUI application to manage Snapper and the Btrfs filesystem, enabling and refining automatic periodic snapshot creatiion and cleanup -- apart from those made during DNF operations, and automating certain Btrfs maintenance tasks by enabling systemd timers provided by the btrfsmaintenance. package.
The process -- while reproducing openSUSE's subvolume layout and fully and natively integrating Snapper in a way that enables all of its advanced features -- is not the most elegent method for making such a system. The most elegant method would be to perform a Kickstart installation which allows complete control of the installation. Unfortunately, the required learnig curve does not have a suitable return on the time investiment for a Fedora user who is not committed to the Red Hat/Fedora methodology and system administration utility ecosystem. But the unelegant method is sufficient to transform a basic Fedora Btrfs installation with the desired subvolume layout and integration of all of Snapper's capability.
Some Konsole Windows Displaying Btrfs, Snapper, and Other Commands Illustrating the End Result System of the Process Described In This Article
The Anaconda Installer
Anaconda, the installer used by Fedora and related distributions, including RHEL, the use in which was discussed in the review of Red Hat Enterprise Linux 9, is a fairly advanced installeri, allowing for advanced configurations, including the ability to set up encrypted RAID partitions. It is organized in a "hub and spoke" paradigm where its major parts are launched from a central screen. Users select each in turn, enter and modify installation parameters, and return to the central screen. Once all parts have been visited and parameters entered to the installers satisfaction, the installation can proceed when the final confirmation button is pressed in the central screen. The following images show the central navigation screen and each of the components. Further below, the Blivet-GUI advanced partitioning component is shown in more detail as part of the initial Btrfs subvolume creation process.


The Anaconda Installer Parts Not Pertaining to Partitioning
Click on any of the thumbnails to view a slideshow of the images.
Part 1: Install, Creating Simple Btrfs Subvolume Layout
Selecting "Installation Destination" under the heading "SYSTEM" (Images 2 and 6, above) starts the Anaconda partitioning and storage configuration component. A screen that lists all available storage devices, from which installation targets may be chosen is shown. The screen also allows manually specifying network storage and other specialized disks, as well as providing checkboxes for initiating encryption configuration workflow. User's can also specify whether Anaconda should automatically partition available storage or whether the custom partitioning tools should be used, one of which is the Blivet-GUI partitioning tool.
We begin our Btrfs installation configuration on this screen by selecting the disks and checking the Blivet-GUI radio button. In this case, both the SKHynix and Samsung disks were chosen, the first on which to create the root partition, the second for the home partition. Image 1, below shows this screen before selctions, and Image 2 shows the screen after the selections.
Selecting "Done" at the top of the "Installation Destination" screen opens the Blivet-GUI interface embedded into Anaconda. This screen lists disks and existing Btrfs subvolumes on the detected disks in the left frame. The top part of the main frame shows the physical layout of disks selected in the left frame, and the bottom part of the right frame shows a list of partitions available if a disk is selected in the left frame, and a list of lower level subvolumes, if a subvolume is chosen in the left frame. Image 3 shows the initial state of this screen on the Lenovo Legion 5i Pro with an existing openSUSE Tumbleweed installation with its default Btrfs subvolume layout, an existing Arch Linux installation with an openSUSE style Btrfs/Snapper configuration, and a Garuda installation on a Btrfs filesystem with a subvolume layout natively compatible with GRUB. The Ultramarine installation will the follow the same layout as the openSUSE and Arch installations, with the exception of creating a subvolume for the GRUB configuration (see Creating openSUSE-style btrfs root partition & subvolumes and An Arch Linux Installation on a Btrfs Filesystem with Snapper for System Snapshots and Rollbacks). This screen is shown in all of the Images 3 - 14 below, with the images illustrating the sequence of interactions in creating our Btrfs subvolumes for the installation. This initial subvolume layout will be significantly modified by the process that follws in the rest of the article.
The root and home partitions -- the root on the SKHynix and the home on the Samsung -- are created by selecting free space on the disks and activating the New" context menu. Image 3 shows the selected free space on the SKHynix and Image 4 shows the dialog which results when activating the "New" menu item, allowing specification of the filesystem format, where "Btrfs Volume" is selected in the dropdown menu. This will cause a new dialog to open specific to the format selected, allowing specification of a partition name and other details as shown in Image 5. The interactions in these two dialogs will result in the creation of a partition with a Btrfs format and the creation by default of the main, top-level subvolume (subvolid=5). The second dialog also allows the specification of a mountpoint, but this should be left blank as we will create a lower level subvolume that will be mounted instead.
Image 6 shows the state of the Blivet-GUI interface after selecting "OK" in the previous dialog. The main subvolume of the new Btrfs partition is now shown in the left pane as ULTRAMARINE_ROOT, the name we previously entered when creating the partition. Selecting the new Btrfs partition in the left pane will display the subvolumes within it on the right pane, in this case there is only one. Activating the context menu on the subvolume shown in the right pane and selecting "New" or clicking the "+" toolbaar item will cause the creation of a new subvolume under the selected main subvolume. Image 7 shows the resulting dialog in which the subvolume name and mountpoint can be specified. A subvolume name of "@", a name used by convention for the subvolume to be mounted at the filesystem hierarchy, is specified. The root of the filesystem hierarchy path, /, is specified as the mountpoint for the @ subvolume. The entries in the dialog will cause the installation image to be copied to subvolume @ when we proceed with the installation. It will also cause this subvolume to be specified as the subvolume to be mounted at / in /etc/fstab.
After confirming the creation of the @ subvolume, the state of the Blivet-GUI interface is shown in Image 8, which indicates that the @ is under the main subvolume, but the utility has appended "-0 to the name specified in the previous dialog. This renaming may be to satisfy a requirement for minimum length, or to distinguish other accessible Btrfs subvolumes with similar names. As we will see when we create a separate Btrfs partition later for /home with an @ subvolume under the main subvolume in that partition, a "-1" will be appended to the name. The order of creating these subvolumes affects what is appended to the entered name; if the home Btrfs partition had been created first, it would have received the "-0".
Image 9 shows the beginning of the same process for the home parition. This time we use the context menu instead of the toolbar to create the partition from free space. In Image 10, we sepcify "Btrfs Volume" as before. In Image 11, which shows the resulting dialog, we specify a name for the partition, but not a mount point. Image 12 shows the main Blivet-GUI interface after the partition specification has been accepted. Here we use the context menu with the new subvolume selected to create a lower level subvolume. In the dialog which opens (Image 13), we specify a name for the new subvoume that will be created under the top-level subvolume as "@" as well as a mount point of /home. Image 14 shows the main Blivet-GUI screen after with the home partition selected in the left pane. The right pane shows that the lower level subvolume has been renamed, as mentioned before, and that it will be mounted to /home for the installation.
Image 15 shows the activation of the "Set mountpoint" context menu item while the ESP (EFI System Partition) is selected, which is itself under the "Edit" menu item. In the resulting dialog, Image 16, the mountpoint "/boot/efi" is specified.
At this point our initial subvolume layout specification, used only for the installation, is complete. We can press "Done" on the main Blivet-GUI interface (Image 17). A summary of actions the partitioner will take is then displayed by the installer in a new dialog, Image 18, providing an oportunity to go back and make changes or accept the configuration. Pressing "Accept Changes will exit Blivet-GUI and return to the main Anaconda screen, where we can initiate the actual installation.


Creating a Btrfs Partition and Subvolumes for the Root Filesystem Using the Blivet-GUI Component of the Anaconda Installer
This installer component was used to delete an existing partition and create a Btrfs partition in the free space, then to create the @ subvolume for mounting to / under the main subvolume, as well as a subvolume for Snapper snapshots under @, as well as subvolumes under the main subvolume for /root, /srv, /var/cache, /var/log, and /var/tmp.
Click on any of the thumbnails to view a slideshow of the images.
Click on any of the thumbnails to view a slideshow of the images.
Part 2: chroot to Install and Initialize Snapper
After closing the Anaconda installer window we will remain in the live environment to perform our modifications to the subvolume layout and other aspects of the installed system. We begin by activating a chroot environment into the installed system and install Snapper. We then initialize the Snapper configuration using the snapper command
snapper --no-dbus create-config /mnt
This command will create the configuration file /etc/snapper/configs/root that will be used to define the operating parameters for snapshots. The command also creates the subvolume required by Snapper to contain snapshots named .snapshots under the subvolume currently mounted at / as well as the corresponding directory, /.snapshots to which the subvolume will be mounted.
-
Use blkid to find the UUIDs of the root, home, and EFI System Partition (ESP) partitions, and optionally the swap partition which will be needed if hibernation capability is desired.
liveuser on localhost-live ~
❯ sudo blkid | grep ULTRA
/dev/nvme0n1p5: LABEL="ULTRAMARINE_HOME" UUID="217d430a-c396-4d44-bc53-bd6a063a4a78" UUID_SUB="eab6bba2-b002-4314-9c57-396c2327b907" BLOCK_SIZE="4096" TYPE="btrfs" PARTUUID="a5edf838-2e3e-4838-b4d6-d9e81ea49d6e"
/dev/nvme1n1p8: LABEL="ULTRAMARINE_ROOT" UUID="1a773ae9-02a6-4e95-bf07-c500427e652b" UUID_SUB="b3616b8d-58d4-4fe6-836a-4266ab1af45b" BLOCK_SIZE="4096" TYPE="btrfs" PARTUUID="bec99faa-f38a-4a07-b5b7-cb101487747c"

liveuser on localhost-live ~
❯ sudo blkid | grep SYSTEM
/dev/nvme1n1p1: LABEL_FATBOOT="SYSTEM_DRV" LABEL="SYSTEM_DRV" UUID="CEFD-1322" BLOCK_SIZE="512" TYPE="vfat" PARTLABEL="EFI System Partition" PARTUUID="96a25ddb-ffc6-457a-8fd1-66c5825235eb"

liveuser on localhost-live ~
❯ sudo blkid | grep swap
/dev/nvme0n1p1: UUID="980ddbbf-9b79-4390-be21-850e62b7ebb2" TYPE="swap" PARTUUID="1356cf0e-d20d-433a-ad5f-3fd564d2b5b7"
/dev/zram0: LABEL="zram0" UUID="6d5c4a76-902b-4f35-bee9-db20344fb0e2" TYPE="swap"
-
The installer mounts various pseudo filesystems and filesystem hierarchy paths at /mnt/sysroot and /mnt/sysimage as a convenience feature. These can be viewed with the mount command, as shown in the following listing, along with its output.
liveuser on localhost-live ~
❯ mount | grep mnt
/dev/nvme1n1p8 on /mnt/sysimage type btrfs (rw,relatime,seclabel,compress=zstd:1,ssd,discard=async,space_cache=v2,subvolid=256,subvol=/@-0)
/dev/nvme1n1p1 on /mnt/sysimage/boot/efi type vfat (rw,relatime,fmask=0077,dmask=0077,codepage=437,iocharset=ascii,shortname=winnt,errors=remount-ro)
devtmpfs on /mnt/sysimage/dev type devtmpfs (rw,nosuid,seclabel,size=4096k,nr_inodes=3035408,mode=755,inode64)
devpts on /mnt/sysimage/dev/pts type devpts (rw,relatime,seclabel,gid=5,mode=620,ptmxmode=000)
tmpfs on /mnt/sysimage/dev/shm type tmpfs (rw,relatime,seclabel,inode64)
/dev/nvme0n1p5 on /mnt/sysimage/home type btrfs (rw,relatime,seclabel,compress=zstd:1,ssd,discard=async,space_cache=v2,subvolid=256,subvol=/@-1)
proc on /mnt/sysimage/proc type proc (rw,relatime)
tmpfs on /mnt/sysimage/run type tmpfs (rw,nosuid,nodev,seclabel,size=4876932k,nr_inodes=819200,mode=755,inode64)
sysfs on /mnt/sysimage/sys type sysfs (rw,relatime,seclabel)
efivarfs on /mnt/sysimage/sys/firmware/efi/efivars type efivarfs (rw,relatime)
selinuxfs on /mnt/sysimage/sys/fs/selinux type selinuxfs (rw,relatime)
tmpfs on /mnt/sysimage/tmp type tmpfs (rw,relatime,seclabel,inode64)
/dev/nvme1n1p8 on /mnt/sysroot type btrfs (rw,relatime,seclabel,compress=zstd:1,ssd,discard=async,space_cache=v2,subvolid=256,subvol=/@-0)
/dev/nvme1n1p1 on /mnt/sysroot/boot/efi type vfat (rw,relatime,fmask=0077,dmask=0077,codepage=437,iocharset=ascii,shortname=winnt,errors=remount-ro)
devtmpfs on /mnt/sysroot/dev type devtmpfs (rw,nosuid,seclabel,size=4096k,nr_inodes=3035408,mode=755,inode64)
devpts on /mnt/sysroot/dev/pts type devpts (rw,relatime,seclabel,gid=5,mode=620,ptmxmode=000)
tmpfs on /mnt/sysroot/dev/shm type tmpfs (rw,relatime,seclabel,inode64)
/dev/nvme0n1p5 on /mnt/sysroot/home type btrfs (rw,relatime,seclabel,compress=zstd:1,ssd,discard=async,space_cache=v2,subvolid=256,subvol=/@-1)
proc on /mnt/sysroot/proc type proc (rw,relatime)
tmpfs on /mnt/sysroot/run type tmpfs (rw,nosuid,nodev,seclabel,size=4876932k,nr_inodes=819200,mode=755,inode64)
sysfs on /mnt/sysroot/sys type sysfs (rw,relatime,seclabel)
efivarfs on /mnt/sysroot/sys/firmware/efi/efivars type efivarfs (rw,relatime)
selinuxfs on /mnt/sysroot/sys/fs/selinux type selinuxfs (rw,relatime)
tmpfs on /mnt/sysroot/tmp type tmpfs (rw,relatime,seclabel,inode64)
It is necessary to unmount these since we will be modifying the Btrfs subvolumes layout and so we can reuse /mnt. Unmount the mounts at /mnt/sysroot and /mnt/sysimage created by the installer.liveuser on localhost-live ~ ❯ sudo umount --recursive /mnt/sysroot liveuser on localhost-live ~ ❯ sudo umount --recursive /mnt/sysimage
-
Verify that the umount was successful and nothing is mounted at /mnt.
liveuser on localhost-live ~
❯ mount | grep mnt
-
Mount the /@-0 subvolume, the subvolume created at installation to contain the root of the filesystem hierarcy and mounted at / during installaiton. Because we didn't (Anaconda would not allow it) create the necessary subvolumes and specify mountpotints for them in the openSUSE hierarchy, everything in the filesystem hierarchy is contained here. This will change by the end of this section such that filesystem hierarchy paths to be excluded from system snapshots are relocated to other subvolumes we will create for them.
liveuser on localhost-live ~
❯ sudo mount UUID="1a773ae9-02a6-4e95-bf07-c500427e652b" /mnt -o subvol=/@-0
-
Mount the /@-1 subvolume, the subvolume created at installation to contain the /home filesystem hierarchy path and paths under it, at /mnt/home. A new directory under /mnt does not need to be created for the mount location as it already exists after the previous mount command. It should be empty since a separate Btrfs subvolume was created on the separate Btrfs partitino created for home.
liveuser on localhost-live ~
❯ sudo mount UUID="217d430a-c396-4d44-bc53-bd6a063a4a78" /mnt/home -o subvol=/@-1
-
Mount the ESP to /mnt/boot/efi. A directory under /mntdoes not need to be created as it should already exist after the first mount command, above. It should be empty at this time.
liveuser on localhost-live ~
❯ sudo mount UUID="CEFD-1322" /mnt/boot/efi
-
Mount the pseudo filesystems needed for the chroot
liveuser on localhost-live ~
❯ sudo mount --bind /dev /mnt/dev

liveuser on localhost-live ~
❯ sudo mount -t proc /proc /mnt/proc

liveuser on localhost-live ~
❯ sudo mount -t sysfs /sys /mnt/sys

liveuser on localhost-live ~
❯ sudo mount -t tmpfs tmpfs /mnt/run

liveuser on localhost-live ~
❯ sudo mount -o bind /dev/pts /mnt/dev/pts

liveuser on localhost-live ~
❯ sudo mount -o bind /sys/firmware/efi/efivars /mnt/sys/firmware/efi/efivars
-
Copy /etc/resolv.conf to the chroot environment.
liveuser on localhost-live ~
❯ sudo cp /etc/resolv.conf /mnt/etc/resolv.conf
-
chroot into the installed system.
liveuser on localhost-live ~
❯ sudo chroot /mnt /usr/bin/bash
The chroot has been successfully activated if the prompt changes to [root@localhost-live /]#. -
Install Snapper
[root@localhost-live /]# dnf install snapper
The command with the output:[root@localhost-live /]# dnf install snapper Fedora 39 - x86_64 6.9 MB/s | 89 MB 00:12 Fedora 39 openh264 (From Cisco) - x86_64 868 B/s | 2.6 kB 00:03 Fedora 39 - x86_64 - Updates 4.0 MB/s | 34 MB 00:08 RPM Fusion for Fedora 39 - Free 294 kB/s | 639 kB 00:02 RPM Fusion for Fedora 39 - Free - Updates 130 kB/s | 234 kB 00:01 RPM Fusion for Fedora 39 - Nonfree 210 kB/s | 259 kB 00:01 RPM Fusion for Fedora 39 - Nonfree - Updates 27 kB/s | 76 kB 00:02 Terra Packages 39 847 kB/s | 2.8 MB 00:03 Ultramarine Linux 39 8.7 kB/s | 30 kB 00:03 Dependencies resolved. ============================================================================================================== Package Architecture Version Repository Size ============================================================================================================== Installing: snapper x86_64 0.10.4-2.fc39 fedora 490 k Installing dependencies: libbtrfs x86_64 6.7.1-1.fc39 updates 27 k snapper-libs x86_64 0.10.4-2.fc39 fedora 365 k Transaction Summary ============================================================================================================== Install 3 Packages Total download size: 883 k Installed size: 2.7 M Is this ok [Y/n]: Downloading Packages: Fedora 39 - x86_64 - Updates 151% [=====================================================] 24 kB/s | 48(1/3): libbtrfs-6.7.1-1.fc39.x86_64.rpm 23 kB/s | 27 kB 00:01 (2/3): snapper-libs-0.10.4-2.fc39.x86_64.rpm 247 kB/s | 365 kB 00:01 (3/3): snapper-0.10.4-2.fc39.x86_64.rpm 260 kB/s | 490 kB 00:01 -------------------------------------------------------------------------------------------------------------- Total 60 kB/s | 883 kB 00:14 Running transaction check Transaction check succeeded. Running transaction test Transaction test succeeded. Running transaction Preparing : 1/1 Installing : libbtrfs-6.7.1-1.fc39.x86_64 1/3 Running scriptlet: snapper-libs-0.10.4-2.fc39.x86_64 2/3 Installing : snapper-libs-0.10.4-2.fc39.x86_64 2/3 Installing : snapper-0.10.4-2.fc39.x86_64 3/3 Running scriptlet: snapper-0.10.4-2.fc39.x86_64 3/3 Running scriptlet: snapper-libs-0.10.4-2.fc39.x86_64 3/3 Running scriptlet: snapper-0.10.4-2.fc39.x86_64 3/3 Verifying : snapper-0.10.4-2.fc39.x86_64 1/3 Verifying : snapper-libs-0.10.4-2.fc39.x86_64 2/3 Verifying : libbtrfs-6.7.1-1.fc39.x86_64 3/3 Installed: libbtrfs-6.7.1-1.fc39.x86_64 snapper-0.10.4-2.fc39.x86_64 snapper-libs-0.10.4-2.fc39.x86_64 Complete! [root@localhost-live /]#
-
Initialize Snapper. The command to intialize Snapper will create a configuration file in /etc/snapper/configs with a name as specified in the command and for the subvolume mounted at the filesystem hierarchy path also specified in the command. It will also create the .snpashots subvolume as a child of the subvolume currently mounted at / in the installed system. From the perspective of the Btrfs filesystem on the partition, the subvolume path will be /@-0/.snapshots. From the perspective of the live environment it will be at /mnt/.snapshots. The corresponding directory .snapshots will also be created under the subvolume mounted at /, or from the live environment filesystem hierarchy perspective /mnt/.snspshots.
[root@localhost-live /]# snapper --no-dbus -c root create-config /
The --no-dbus option is necessary because we are in a chroot environment; without it the command would fail. The name of the configuration is root, specified as an argument to the option -c, and the final / specifies the configuration is for snapshots of the subvolume mounted at /.
While our chroot environment is still active, We can see the effect of installing and initializing Snapper in another terminal, as shown in the following listing.
liveuser on localhost-live ~
❯ sudo btrfs subvolume list /mnt
ID 256 gen 29 top level 5 path @-0
ID 257 gen 28 top level 256 path .snapshots

liveuser on localhost-live ~
❯ ls -la /mnt
total 20
dr-xr-xr-x.   1 root root  180 Mar 19 06:56 .
drwxr-xr-x.   1 root root  260 Mar 19 06:14 ..
... excised ...
lrwxrwxrwx.   1 root root    8 Jul 21  2023 sbin -> usr/sbin
drwxr-x---.   1 root root    0 Mar 19 06:56 .snapshots
drwxr-xr-x.   1 root root    0 Jul 21  2023 srv
... truncated ...
The output of the first command shows that there is now a new subvolume named .snapshots with a subvolume ID of 257 under a parent subvolume named @-0 which has a subvolume ID 256. The output of the second command shows that there is now a directory named .snapshots under the filesystem hierarchy root, which is mounted at /mnt in the live ISO environment.
Part 3: Create Initial Snapshot Subvolume and Subvolumes for Filesystem Hierarchy Paths to Be Excluded from Snapshots
In the chroot environment, we can continue with the process to move the contents of the subvilume created at installation for the root of the filesystem hierarchy, to a snapshot (a snapshot is a special subvolume) under the .snapshots subvolume. In the SUSE way, which is natively compatible with Snapper, each snapshots is stored under .snapahots within a directory named for the snapshot number. Each time a new snapshots is created by Snapper, a new directory is created for the new snapshot. The initial system is installed to Snapshot 1 by openSUSE's installer at the subvolume path /@/.snapshots/1/snapshot. In our case we will, reproduce this by creating the appropriate subvolume and moving the contents of /@-0 -- created by and set to be mounted at / by Anaconda -- to a subvolume with the same subvolume path as openSUSE's initial snapshot that we will create manually now. a copied to the first snapshot directory. We will move our filesystem hierarchy root from /@-0 to /@-0/.snapshots/1/snpashot.
-
Make a subvolume inside the subvolume created for snapshots by initializing Snapper at the subvolume path /.snapshots/1/snapshot.
[root@localhost-live /]# btrfs subvolume create -p /.snapshots/1/snapshot
Create subvolume '/.snapshots/1/snapshot'
The name of the subvolume is snapshot. The -p option specifies that necessary intermediate directories in the subvolume path be created, in this case creating the directory .snapshots/1. When Snapper is used to create snapshots it will create similar paths incrementing the numbered directory by one each time a snapshot is created. The result of this is a new subvolume at subvolume path /.snapshots/1/snapshot. (Remember that in this path 1 is only a directory, all other elements are actual subvolumes) -
Create the other subvolumes to contain parts of the filesystem hierarchy to be excluded from snapshots.
[root@localhost-live /]# btrfs subvolume create -p /@opt
Create subvolume '//@opt'
[root@localhost-live /]# btrfs subvolume create -p /@root
Create subvolume '//@root'
[root@localhost-live /]# btrfs subvolume create -p /@srv
Create subvolume '//@srv'
[root@localhost-live /]# btrfs subvolume create -p /@usrlocal
Create subvolume '//@usrlocal'
[root@localhost-live /]# btrfs subvolume create -p /@varcache
Create subvolume '//@varcache'
[root@localhost-live /]# btrfs subvolume create -p /@varlog
Create subvolume '//@varlog'
[root@localhost-live /]# btrfs subvolume create -p /@vartmp
Create subvolume '//@vartmp'
After the above commands, in a second termainal we can see that the subvolumes have been created:liveuser on localhost-live ~ ❯ sudo btrfs subvolume list /mnt ID 256 gen 32 top level 5 path @-0 ID 257 gen 31 top level 256 path .snapshots ID 258 gen 31 top level 257 path .snapshots/1/snapshot ID 259 gen 31 top level 256 path @opt ID 260 gen 32 top level 256 path @root ID 261 gen 32 top level 256 path @srv ID 262 gen 32 top level 256 path @usrlocal ID 263 gen 33 top level 256 path @varcache ID 264 gen 33 top level 256 path @varlog ID 265 gen 33 top level 256 path @vartmp
-
Exit the chroot
[root@localhost-live /]# exit
exit
-
Unmount all subvolumes and mounts created for the chroot.
liveuser on localhost-live ~
❯umount --recursive /mnt
Part 4: Move Original Subvolume Contents to New Subvolumes
At this point, our root filesystem hierarchy is in subvolume /@-0. Because of Blivet-GUI's inflexibility, we could not create the subvolumes used to contain the parts of the filesystem hierarchy to be excluded from system snapshots in the desired hierarchical structure as implemented in openSUSE. We will now create these subvolumes after which we will move the contents of subvolume /@-0 mounted at / at installation and currently mounted at /mnt in the live ISO environment, to the initial snapshot subvolume, and the contents of the original subvolume that should be excluded from snapshots to the new subvolumes. This will be a multiple step process where we first move the entire system to the initial snapshot subvolume, then move the excluded paths one by one to the appropriate subvolume.
-
Verify that there is nothing mounted at /mnt
liveuser on localhost-live ~
❯ mount | grep mnt
There should not be any output. -
Mount current root subvolume.
liveuser on localhost-live ~
❯ sudo mount UUID="1a773ae9-02a6-4e95-bf07-c500427e652b" /mnt -o subvol=/@-0
Verify the mountliveuser on localhost-live ~ ❯ mount | grep mnt /dev/nvme1n1p8 on /mnt type btrfs (rw,relatime,seclabel,ssd,discard=async,space_cache=v2,subvolid=256,subvol=/@-0)
-
Because of the nature of the Btrfs filesystem, when the subvolumes were created above while the /@-0 was at the root of the filesystem hierarchy (in the chroot), corresponding directories were created for the subvolumes. For example, when the /@-0/@root subvolume (in terms of absolute subvolume path) was created with the command
btrfs subvolume create /@root
where in this case the / in /@root was in fact the /@-0 subvolume, because it was mounted at /mnt and /mnt became the root of the filesystem hierarchy in the chroot, a corresponding directory was created at /mnt/@root. Directories for the other subvolumes created were also made. We can see these with:liveuser on localhost-live ~ ❯ ls -la /mnt | grep @ drwxr-xr-x. 1 root root 0 Mar 19 06:59 @opt drwxr-xr-x. 1 root root 0 Mar 19 06:59 @root drwxr-xr-x. 1 root root 0 Mar 19 06:59 @srv drwxr-xr-x. 1 root root 0 Mar 19 07:00 @usrlocal drwxr-xr-x. 1 root root 0 Mar 19 07:00 @varcache drwxr-xr-x. 1 root root 0 Mar 19 07:00 @varlog drwxr-xr-x. 1 root root 0 Mar 19 07:00 @vartmp
-
Mount the other subvolumes that will, at then end of the process, contain the parts of the filesystem hierarchy to be excluded from system snapshots.
liveuser on localhost-live ~
❯ sudo mount UUID="1a773ae9-02a6-4e95-bf07-c500427e652b" /mnt/@opt -o subvol=/@-0/@opt

liveuser on localhost-live ~
❯ sudo mount UUID="1a773ae9-02a6-4e95-bf07-c500427e652b" /mnt/@root -o subvol=/@-0/@root

liveuser on localhost-live ~
❯ sudo mount UUID="1a773ae9-02a6-4e95-bf07-c500427e652b" /mnt/@srv -o subvol=/@-0/@srv

liveuser on localhost-live ~
❯ sudo mount UUID="1a773ae9-02a6-4e95-bf07-c500427e652b" /mnt/@usrlocal -o subvol=/@-0/@usrlocal

liveuser on localhost-live ~
❯ sudo mount UUID="1a773ae9-02a6-4e95-bf07-c500427e652b" /mnt/@varcache -o subvol=/@-0/@varcache

liveuser on localhost-live ~
❯ sudo mount UUID="1a773ae9-02a6-4e95-bf07-c500427e652b" /mnt/@varlog -o subvol=/@-0/@varlog

liveuser on localhost-live ~
❯ sudo mount UUID="1a773ae9-02a6-4e95-bf07-c500427e652b" /mnt/@vartmp -o subvol=/@-0/@vartmp
Verify that the subvolumes were mounted.liveuser on localhost-live ~ ❯ mount | grep mnt /dev/nvme1n1p8 on /mnt type btrfs (rw,relatime,seclabel,ssd,discard=async,space_cache=v2,subvolid=256,subvol=/@-0) /dev/nvme1n1p8 on /mnt/@opt type btrfs (rw,relatime,seclabel,ssd,discard=async,space_cache=v2,subvolid=259,subvol=/@-0/@opt) /dev/nvme1n1p8 on /mnt/@root type btrfs (rw,relatime,seclabel,ssd,discard=async,space_cache=v2,subvolid=260,subvol=/@-0/@root) /dev/nvme1n1p8 on /mnt/@srv type btrfs (rw,relatime,seclabel,ssd,discard=async,space_cache=v2,subvolid=261,subvol=/@-0/@srv) /dev/nvme1n1p8 on /mnt/@usrlocal type btrfs (rw,relatime,seclabel,ssd,discard=async,space_cache=v2,subvolid=262,subvol=/@-0/@usrlocal) /dev/nvme1n1p8 on /mnt/@varcache type btrfs (rw,relatime,seclabel,ssd,discard=async,space_cache=v2,subvolid=263,subvol=/@-0/@varcache) /dev/nvme1n1p8 on /mnt/@varlog type btrfs (rw,relatime,seclabel,ssd,discard=async,space_cache=v2,subvolid=264,subvol=/@-0/@varlog) /dev/nvme1n1p8 on /mnt/@vartmp type btrfs (rw,relatime,seclabel,ssd,discard=async,space_cache=v2,subvolid=265,subvol=/@-0/@vartmp)
-
Change to the root user. This will be necessary when moving -/root (/mnt/root from the perspective of the live ISO environment, /@-0/root in terms of the subvolume path -- here root is only a directory).
liveuser on localhost-live ~
❯ su
-
We will now move the contents of /@-0 to /@-0/.snapshots/1/snapshot. After this mv command, the parts of the filesystem hierarchy that should be excluded from snapshots will be moved from /@-0/.snapshots/1/snapshot to their respective separate subvolumes later. To see the effect, first view the contents of /mnt and /mnt/.snapshots/1/snapshot before the command which we will compare to similar output after the command:
[root@localhost-live liveuser]# ls -la /mnt /mnt/.snapshots/1/snapshot
/mnt:
total 20
dr-xr-xr-x. 1 root root  270 Mar 19 07:00 .
drwxr-xr-x. 1 root root  260 Mar 19 06:14 ..
dr-xr-xr-x. 1 root root    0 Jul 21  2023 afs
lrwxrwxrwx. 1 root root    7 Jul 21  2023 bin -> usr/bin
dr-xr-xr-x. 1 root root  618 Mar 19 06:38 boot
-rw-r--r--. 1 root root  191 Jan  2 00:59 .buildstamp
drwxr-xr-x. 1 root root    0 Mar 19 06:35 dev
drwxr-xr-x. 1 root root 4488 Mar 19 06:55 etc
drwxr-xr-x. 1 root root    0 Mar 19 06:35 home
lrwxrwxrwx. 1 root root    7 Jul 21  2023 lib -> usr/lib
lrwxrwxrwx. 1 root root    9 Jul 21  2023 lib64 -> usr/lib64
drwxr-xr-x. 1 root root    0 Jul 21  2023 media
drwxr-xr-x. 1 root root    0 Jul 21  2023 mnt
drwxr-xr-x. 1 root root    0 Mar 19 06:59 @opt
drwxr-xr-x. 1 root root    0 Jul 21  2023 opt
drwxr-xr-x. 1 root root    0 Mar 19 06:35 proc
drwxr-xr-x. 1 root root    0 Mar 19 06:59 @root
dr-xr-x---. 1 root root  188 Mar 19 07:01 root
drwxr-xr-x. 1 root root    0 Mar 19 06:35 run
lrwxrwxrwx. 1 root root    8 Jul 21  2023 sbin -> usr/sbin
drwxr-x---. 1 root root    2 Mar 19 06:59 .snapshots
drwxr-xr-x. 1 root root    0 Mar 19 06:59 @srv
drwxr-xr-x. 1 root root    0 Jul 21  2023 srv
drwxr-xr-x. 1 root root    0 Mar 19 06:35 sys
drwxrwxrwt. 1 root root    0 Mar 19 06:55 tmp
drwxr-xr-x. 1 root root  168 Jan  2 00:52 usr
drwxr-xr-x. 1 root root    0 Mar 19 07:00 @usrlocal
drwxr-xr-x. 1 root root  180 Jan  2 00:55 var
drwxr-xr-x. 1 root root    0 Mar 19 07:00 @varcache
drwxr-xr-x. 1 root root    0 Mar 19 07:00 @varlog
drwxr-xr-x. 1 root root    0 Mar 19 07:00 @vartmp

/mnt/.snapshots/1/snapshot:
total 0
drwxr-xr-x. 1 root root  0 Mar 19 06:59 .
drwxr-xr-x. 1 root root 16 Mar 19 06:59 ..
Note that before the mv command, /mnt/.snapshots/1/snapshot is empty but /mnt is populated with the files and directories that should be in /.
Move the contents of /mnt to /mnt/.snapshots/1/snapshot (in terms of subvolume paths: /@-0 to /@-0/.snapshots/1/snapshot).[root@localhost-live liveuser]# mv /mnt/* /mnt/.snapshots/1/snapshot/
-
The previous command moved the entire contents of the filesystem hierarchy -- including the parts of the filesystem hierarchy we wish to exclude from system snapshots -- from the original subvolume created during installation (subvolume path /@-0) to the initial snapshot subvolume we created after installation, (subvolume path /@-0/.snapshots/1/snapshot). The output of the command, as shown below does not look good and is the result of how mount works and the nature of the Btrfs filesystem.
[root@localhost-live liveuser]# mv /mnt/* /mnt/.snapshots/1/snapshot/
mv: cannot move '/mnt/@opt' to '/mnt/.snapshots/1/snapshot/@opt': Device or resource busy
mv: cannot move '/mnt/@root' to '/mnt/.snapshots/1/snapshot/@root': Device or resource busy
mv: cannot move '/mnt/@srv' to '/mnt/.snapshots/1/snapshot/@srv': Device or resource busy
mv: cannot move '/mnt/@usrlocal' to '/mnt/.snapshots/1/snapshot/@usrlocal': Device or resource busy
mv: cannot move '/mnt/@varcache' to '/mnt/.snapshots/1/snapshot/@varcache': Device or resource busy
mv: cannot move '/mnt/@varlog' to '/mnt/.snapshots/1/snapshot/@varlog': Device or resource busy
mv: cannot move '/mnt/@vartmp' to '/mnt/.snapshots/1/snapshot/@vartmp': Device or resource busy
But what the output is indicating, -- that the subvolumes it references could not be moved is exactly what we want; we don't want the @opt, @root, @srv, @usrlocal, @varcache, @varlog or @vartmp subvolumes to be moved beneath /@-0/.snapshots/1/snapshot/. The direcories /opt, /root/srv/usr/local/var/cache/var/log or /var/tmp -- in terms of the installed system filessytem hierarchy -- did move along with everything else, except hidden files, in -/ -- from the perspective of the installed system. The lisitng of -/mnt and /mnt/.snapshots/1/snapshot after the above mv command is shown below for comparison from the listing before the move.[root@localhost-live liveuser]# ls -la /mnt /mnt/.snapshots/1/snapshot /mnt: total 4 dr-xr-xr-x. 1 root root 132 Mar 19 07:11 . drwxr-xr-x. 1 root root 260 Mar 19 06:14 .. -rw-r--r--. 1 root root 191 Jan 2 00:59 .buildstamp drwxr-xr-x. 1 root root 0 Mar 19 06:59 @opt drwxr-xr-x. 1 root root 0 Mar 19 06:59 @root drwxr-x---. 1 root root 2 Mar 19 06:59 .snapshots drwxr-xr-x. 1 root root 0 Mar 19 06:59 @srv drwxr-xr-x. 1 root root 0 Mar 19 07:00 @usrlocal drwxr-xr-x. 1 root root 0 Mar 19 07:00 @varcache drwxr-xr-x. 1 root root 0 Mar 19 07:00 @varlog drwxr-xr-x. 1 root root 0 Mar 19 07:00 @vartmp /mnt/.snapshots/1/snapshot: total 16 drwxr-xr-x. 1 root root 138 Mar 19 07:11 . drwxr-xr-x. 1 root root 16 Mar 19 06:59 .. dr-xr-xr-x. 1 root root 0 Jul 21 2023 afs lrwxrwxrwx. 1 root root 7 Jul 21 2023 bin -> usr/bin dr-xr-xr-x. 1 root root 618 Mar 19 06:38 boot drwxr-xr-x. 1 root root 0 Mar 19 06:35 dev drwxr-xr-x. 1 root root 4488 Mar 19 06:55 etc drwxr-xr-x. 1 root root 0 Mar 19 06:35 home lrwxrwxrwx. 1 root root 7 Jul 21 2023 lib -> usr/lib lrwxrwxrwx. 1 root root 9 Jul 21 2023 lib64 -> usr/lib64 drwxr-xr-x. 1 root root 0 Jul 21 2023 media drwxr-xr-x. 1 root root 0 Jul 21 2023 mnt drwxr-xr-x. 1 root root 0 Jul 21 2023 opt drwxr-xr-x. 1 root root 0 Mar 19 06:35 proc dr-xr-x---. 1 root root 188 Mar 19 07:01 root drwxr-xr-x. 1 root root 0 Mar 19 06:35 run lrwxrwxrwx. 1 root root 8 Jul 21 2023 sbin -> usr/sbin drwxr-xr-x. 1 root root 0 Jul 21 2023 srv drwxr-xr-x. 1 root root 0 Mar 19 06:35 sys drwxrwxrwt. 1 root root 0 Mar 19 06:55 tmp drwxr-xr-x. 1 root root 168 Jan 2 00:52 usr drwxr-xr-x. 1 root root 180 Jan 2 00:55 var
Where before /mnt/.snapshots/1/snapshot was empty, now it is populated with the files that were previously in /mnt, i.e., that were moved into it from /mnt, with the exception of one hidden file and the .snapshots directory, also hidden.
We move hidden files and directories with the similar command (. before the *):[root@localhost-live liveuser]# mv /mnt/.* /mnt/.snapshots/1/snapshot/ mv: cannot move '/mnt/.snapshots' to a subdirectory of itself, '/mnt/.snapshots/1/snapshot/.snapshots'
For the same reasons as the @... subvolumes, .snapshots could not be moved, but the one hidden file -- .buildstamp was moved, as the listing of /mnt and /mnt/.snapshots/1/snapshot, below, shows. Again, we don't want .snapshots to be moved. We want the subvolume to be under /@-0.[root@localhost-live liveuser]# ls -la /mnt /mnt/.snapshots/1/snapshot /mnt: total 0 dr-xr-xr-x. 1 root root 110 Mar 19 07:12 . drwxr-xr-x. 1 root root 260 Mar 19 06:14 .. drwxr-xr-x. 1 root root 0 Mar 19 06:59 @opt drwxr-xr-x. 1 root root 0 Mar 19 06:59 @root drwxr-x---. 1 root root 2 Mar 19 06:59 .snapshots drwxr-xr-x. 1 root root 0 Mar 19 06:59 @srv drwxr-xr-x. 1 root root 0 Mar 19 07:00 @usrlocal drwxr-xr-x. 1 root root 0 Mar 19 07:00 @varcache drwxr-xr-x. 1 root root 0 Mar 19 07:00 @varlog drwxr-xr-x. 1 root root 0 Mar 19 07:00 @vartmp /mnt/.snapshots/1/snapshot: total 20 drwxr-xr-x. 1 root root 160 Mar 19 07:12 . drwxr-xr-x. 1 root root 16 Mar 19 06:59 .. dr-xr-xr-x. 1 root root 0 Jul 21 2023 afs lrwxrwxrwx. 1 root root 7 Jul 21 2023 bin -> usr/bin dr-xr-xr-x. 1 root root 618 Mar 19 06:38 boot -rw-r--r--. 1 root root 191 Jan 2 00:59 .buildstamp drwxr-xr-x. 1 root root 0 Mar 19 06:35 dev drwxr-xr-x. 1 root root 4488 Mar 19 06:55 etc drwxr-xr-x. 1 root root 0 Mar 19 06:35 home lrwxrwxrwx. 1 root root 7 Jul 21 2023 lib -> usr/lib lrwxrwxrwx. 1 root root 9 Jul 21 2023 lib64 -> usr/lib64 drwxr-xr-x. 1 root root 0 Jul 21 2023 media drwxr-xr-x. 1 root root 0 Jul 21 2023 mnt drwxr-xr-x. 1 root root 0 Jul 21 2023 opt drwxr-xr-x. 1 root root 0 Mar 19 06:35 proc dr-xr-x---. 1 root root 188 Mar 19 07:01 root drwxr-xr-x. 1 root root 0 Mar 19 06:35 run lrwxrwxrwx. 1 root root 8 Jul 21 2023 sbin -> usr/sbin drwxr-xr-x. 1 root root 0 Jul 21 2023 srv drwxr-xr-x. 1 root root 0 Mar 19 06:35 sys drwxrwxrwt. 1 root root 0 Mar 19 06:55 tmp drwxr-xr-x. 1 root root 168 Jan 2 00:52 usr drwxr-xr-x. 1 root root 180 Jan 2 00:55 var
-
Before we move the filesystem hierarchy paths that should be excluded from snapshots to their separate respective subvolumes, we verify that the directories /opt, /srv, and /var/tmp are empty after installation. Since they are empty we will not bother moving these. We can verify that they are empty:
[root@localhost-live liveuser]# ls -la /mnt/.snapshots/1/snapshot/{opt,srv,var/tmp}
/mnt/.snapshots/1/snapshot/opt:
total 0
drwxr-xr-x. 1 root root   0 Jul 21  2023 .
drwxr-xr-x. 1 root root 160 Mar 19 07:12 ..

/mnt/.snapshots/1/snapshot/srv:
total 0
drwxr-xr-x. 1 root root   0 Jul 21  2023 .
drwxr-xr-x. 1 root root 160 Mar 19 07:12 ..

/mnt/.snapshots/1/snapshot/var/tmp:
total 0
drwxrwxrwt. 1 root root   0 Mar 19 06:55 .
drwxr-xr-x. 1 root root 180 Jan  2 00:55 ..
But /root, /usr/local, /var/cache, /var/log are not. We will relocate the contents of these directories to their appropriate separate subvolumes. -
Before we move the contents of /root, at /mnt/.snapshots/1/snapshotroot from the perspective of the live ISO environment, to the /@-0/@root subvolume, currently mounted at /mnt/@root in the live ISO environment, we list the contents of /mnt/.snapshots/1/snapshotroot and /mnt/@root so we see the effect of the move.
[root@localhost-live liveuser]# ls -la /mnt/.snapshots/1/snapshot/root /mnt/@root
/mnt/@root:
total 0
drwxr-xr-x. 1 root root   0 Mar 19 06:59 .
dr-xr-xr-x. 1 root root 110 Mar 19 07:12 ..

/mnt/.snapshots/1/snapshot/root:
total 32
dr-xr-x---. 1 root root  188 Mar 19 07:01 .
drwxr-xr-x. 1 root root  160 Mar 19 07:12 ..
-rw-------. 1 root root 1334 Mar 19 06:39 anaconda-ks.cfg
-rw-------. 1 root root  357 Mar 19 07:01 .bash_history
-rw-r--r--. 1 root root   18 Jul 21  2023 .bash_logout
-rw-r--r--. 1 root root  141 Jul 21  2023 .bash_profile
-rw-r--r--. 1 root root  429 Jul 21  2023 .bashrc
drwxr-xr-x. 1 root root   14 Jan  2 00:59 .config
-rw-r--r--. 1 root root  100 Jul 21  2023 .cshrc
-rw-r--r--. 1 root root  104 Jan  2 00:59 .gtkrc-2.0
drwx------. 1 root root    0 Jan  2 00:51 .ssh
-rw-r--r--. 1 root root  129 Jul 21  2023 .tcshrc
The above listing shows that, at this point, /mnt/@root is empty and /mnt/.snapshots/1/snapshotroot is populated with root's files. Move the non-hidden files:[root@localhost-live liveuser]# mv /mnt/.snapshots/1/snapshot/root/* /mnt/@root/
Then move hidden files:[root@localhost-live liveuser]# mv /mnt/.snapshots/1/snapshot/root/.* /mnt/@root/
The listing of /mnt/.snapshots/1/snapshot/root and /mnt/@root shows that unlike the previous listing, before the move, /mnt/.snapshots/1/snapshotroot is now empty, but /mnt/@root is now populated with the items that were previously in /mnt/.snapshots/1/snapshotroot.[root@localhost-live liveuser]# ls -la /mnt/.snapshots/1/snapshot/root /mnt/@root /mnt/@root: total 32 drwxr-xr-x. 1 root root 188 Mar 19 07:16 . dr-xr-xr-x. 1 root root 110 Mar 19 07:12 .. -rw-------. 1 root root 1334 Mar 19 06:39 anaconda-ks.cfg -rw-------. 1 root root 357 Mar 19 07:01 .bash_history -rw-r--r--. 1 root root 18 Jul 21 2023 .bash_logout -rw-r--r--. 1 root root 141 Jul 21 2023 .bash_profile -rw-r--r--. 1 root root 429 Jul 21 2023 .bashrc drwxr-xr-x. 1 root root 14 Jan 2 00:59 .config -rw-r--r--. 1 root root 100 Jul 21 2023 .cshrc -rw-r--r--. 1 root root 104 Jan 2 00:59 .gtkrc-2.0 drwx------. 1 root root 0 Jan 2 00:51 .ssh -rw-r--r--. 1 root root 129 Jul 21 2023 .tcshrc /mnt/.snapshots/1/snapshot/root: total 0 dr-xr-x---. 1 root root 0 Mar 19 07:16 . drwxr-xr-x. 1 root root 160 Mar 19 07:12 ..
-
Before we move the contents of /usr/local, now at /mnt/.snapshots/1/snapshot/usr/local in the live ISO environment, to the /@-0/@usrlocal subvolume, currently mounted at /mnt/@usrlocal, we list the contents of /mnt/mnt/.snapshots/1/snapshot//usr/local and /mnt/@usrlocal to compare to the contents after the move.
[root@localhost-live liveuser]# ls -la /mnt/.snapshots/1/snapshot/usr/local /mnt/@usrlocal
/mnt/.snapshots/1/snapshot/usr/local:
total 0
drwxr-xr-x. 1 root root  90 Jan  2 00:51 .
drwxr-xr-x. 1 root root 168 Jan  2 00:52 ..
drwxr-xr-x. 1 root root   0 Jul 21  2023 bin
drwxr-xr-x. 1 root root   0 Jul 21  2023 etc
drwxr-xr-x. 1 root root   0 Jul 21  2023 games
drwxr-xr-x. 1 root root   0 Jul 21  2023 include
drwxr-xr-x. 1 root root   0 Jul 21  2023 lib
drwxr-xr-x. 1 root root   6 Jan  2 00:51 lib64
drwxr-xr-x. 1 root root   0 Jul 21  2023 libexec
drwxr-xr-x. 1 root root   0 Jul 21  2023 sbin
drwxr-xr-x. 1 root root  38 Jan  2 00:51 share
drwxr-xr-x. 1 root root   0 Jul 21  2023 src

/mnt/@usrlocal:
total 0
drwxr-xr-x. 1 root root   0 Mar 19 07:00 .
dr-xr-xr-x. 1 root root 110 Mar 19 07:12 ..
Move the non-hidden files and directories.[root@localhost-live liveuser]# mv /mnt/.snapshots/1/snapshot/usr/local/* /mnt/@usrlocal/
Then move hidden files.[root@localhost-live liveuser]# mv /mnt/.snapshots/1/snapshot/usr/local/.* /mnt/@usrlocal/ mv: cannot stat '/mnt/.snapshots/1/snapshot/usr/local/.*': No such file or directory
The output indicates that, in this case, there were no hidden files or directories in /mnt/mnt/.snapshots/1/snapshot//usr/local. To compare with the previous listing showing the contents of /mnt/mnt/.snapshots/1/snapshot//usr/local and /mnt/@usrlocal we list the current contents after the move:/mnt/.snapshots/1/snapshot/usr/local: total 0 drwxr-xr-x. 1 root root 0 Mar 19 07:17 . drwxr-xr-x. 1 root root 168 Jan 2 00:52 .. /mnt/@usrlocal: total 0 drwxr-xr-x. 1 root root 90 Mar 19 07:17 . dr-xr-xr-x. 1 root root 110 Mar 19 07:12 .. drwxr-xr-x. 1 root root 0 Jul 21 2023 bin drwxr-xr-x. 1 root root 0 Jul 21 2023 etc drwxr-xr-x. 1 root root 0 Jul 21 2023 games drwxr-xr-x. 1 root root 0 Jul 21 2023 include drwxr-xr-x. 1 root root 0 Jul 21 2023 lib drwxr-xr-x. 1 root root 6 Jan 2 00:51 lib64 drwxr-xr-x. 1 root root 0 Jul 21 2023 libexec drwxr-xr-x. 1 root root 0 Jul 21 2023 sbin drwxr-xr-x. 1 root root 38 Jan 2 00:51 share drwxr-xr-x. 1 root root 0 Jul 21 2023 src
Unlike in the previous listing of the same command, the empty directory and the directory with contents are now reversed, i.e., the contents of /mnt/mnt/.snapshots/1/snapshot//usr/local have been moved to /mnt/@usrlocal. -
Before we move the contents of /var/cache, now at /mnt/.snapshots/1/snapshot/var/cache in the live ISO environment, to the /@-0/@varcache subvolume, currently mounted at /mnt/@varcache, we list the contents of the source and destination.
[root@localhost-live liveuser]# ls -la /mnt/.snapshots/1/snapshot/var/cache /mnt/@varcache
/mnt/.snapshots/1/snapshot/var/cache:
total 0
drwxr-xr-x. 1 root root  178 Jan  2 00:53 .
drwxr-xr-x. 1 root root  180 Jan  2 00:55 ..
drwxrwxr-x. 1 abrt abrt   40 Jan  2 00:53 abrt-di
drwxr-xr-x. 1 root root   22 Jan  2 00:51 app-info
drwxr-xr-x. 1 root root    0 Jul 21  2023 bpf
drwxr-xr-x. 1 root root 1664 Mar 19 06:55 dnf
drwxr-xr-x. 1 root root    0 Dec  4 00:00 fwupd
drwxr-xr-x. 1 root root    6 Jan  2 00:53 ibus
drwxr-xr-x. 1 root root    0 Nov 15 00:00 krb5rcache
drwx------. 1 root root   18 Mar 19 06:55 ldconfig
drwxr-xr-x. 1 root root   14 Jan  2 00:51 libX11
drwxr-xr-x. 1 root root  122 Jan  2 00:55 man
drwxr-xr-x. 1 root root    0 Jul 25  2023 PackageKit
drwx------. 1 root root    0 Jan  2 00:51 private
drwxr-xr-x. 1 root root    0 Jul 21  2023 realmd
drwxr-xr-x. 1 root root   10 Jan  2 00:53 swcatalog

/mnt/@varcache:
total 0
drwxr-xr-x. 1 root root   0 Mar 19 07:00 .
dr-xr-xr-x. 1 root root 110 Mar 19 07:12 ..
Move the contents.[root@localhost-live liveuser]# mv /mnt/.snapshots/1/snapshot/var/cache/* /mnt/@varcache/
There are no hidden files, so the above is sufficient. We list the contents of the source and destination after the mv command to compare with the previous contents.[root@localhost-live liveuser]# ls -la /mnt/.snapshots/1/snapshot/var/cache /mnt/@varcache /mnt/.snapshots/1/snapshot/var/cache: total 0 drwxr-xr-x. 1 root root 0 Mar 19 07:19 . drwxr-xr-x. 1 root root 180 Jan 2 00:55 .. /mnt/@varcache: total 0 drwxr-xr-x. 1 root root 178 Mar 19 07:19 . dr-xr-xr-x. 1 root root 110 Mar 19 07:12 .. drwxrwxr-x. 1 abrt abrt 40 Jan 2 00:53 abrt-di drwxr-xr-x. 1 root root 22 Jan 2 00:51 app-info drwxr-xr-x. 1 root root 0 Jul 21 2023 bpf drwxr-xr-x. 1 root root 1664 Mar 19 06:55 dnf drwxr-xr-x. 1 root root 0 Dec 4 00:00 fwupd drwxr-xr-x. 1 root root 6 Jan 2 00:53 ibus drwxr-xr-x. 1 root root 0 Nov 15 00:00 krb5rcache drwx------. 1 root root 18 Mar 19 06:55 ldconfig drwxr-xr-x. 1 root root 14 Jan 2 00:51 libX11 drwxr-xr-x. 1 root root 122 Jan 2 00:55 man drwxr-xr-x. 1 root root 0 Jul 25 2023 PackageKit drwx------. 1 root root 0 Jan 2 00:51 private drwxr-xr-x. 1 root root 0 Jul 21 2023 realmd drwxr-xr-x. 1 root root 10 Jan 2 00:53 swcatalog
/mnt/.snapshots/1/snapshot/var/cache is now empty, while /mnt/@varcahce is now populated. -
We list the contents of /var/log, now at /mnt/.snapshots/1/snapshot/var/log in the live ISO environment, before moving it to the /@-0/@varlog subvolume, currently mounted at /mnt/@varlog.
root@localhost-live liveuser]# ls -la /mnt/.snapshots/1/snapshot/var/log /mnt/@varlog
/mnt/.snapshots/1/snapshot/var/log:
total 1212
drwxr-xr-x. 1 root   root               324 Mar 19 06:40 .
drwxr-xr-x. 1 root   root               180 Jan  2 00:55 ..
drwxr-xr-x. 1 root   root               234 Mar 19 06:40 anaconda
drwx------. 1 root   root                 0 Nov  4 00:00 audit
drwxr-xr-x. 1 root   root                 0 Oct  6 00:00 blivet-gui
-rw-rw----. 1 root   utmp                 0 Jan  2 00:51 btmp
drwxr-x---. 1 chrony chrony               0 Dec  5 00:00 chrony
drwxr-xr-x. 1 root   lp                   0 Dec 15 00:00 cups
-rw-r--r--. 1 root   root            377758 Mar 19 06:55 dnf.librepo.log
-rw-r--r--. 1 root   root            667405 Mar 19 06:55 dnf.log
-rw-r--r--. 1 root   root            182248 Mar 19 06:55 dnf.rpm.log
-rw-r--r--. 1 root   root               540 Mar 19 06:55 hawkey.log
drwxr-sr-x. 1 root   systemd-journal      0 Jan  2 00:51 journal
-rw-rw-r--. 1 root   utmp                 0 Jan  2 00:51 lastlog
drwxr-x---. 1 mysql  mysql                0 Nov 16 00:00 mariadb
drwx------. 1 root   root                 0 Jul 25  2023 ppp
drwx------. 1 root   root                 0 Jan  2 00:51 private
drwxr-xr-x. 1 root   root                 0 Nov 28 00:00 qemu-ga
lrwxrwxrwx. 1 root   root                39 Jan  2 00:51 README -> ../../usr/share/doc/systemd/README.logs
drwx------. 1 root   root                 6 Jan  2 00:51 samba
drwx------. 1 root   root                 0 Aug  7  2023 speech-dispatcher
drwxr-x---. 1 root   root                 0 Nov 15 00:00 sssd
-rw-------. 1 root   root                 0 Jan  2 00:51 tallylog
-rw-rw-r--. 1 root   utmp                 0 Jan  2 00:51 wtmp

/mnt/@varlog:
total 0
drwxr-xr-x. 1 root root   0 Mar 19 07:00 .
dr-xr-xr-x. 1 root root 110 Mar 19 07:12 ..
Relocate the files.[root@localhost-live liveuser]# mv /mnt/.snapshots/1/snapshot/var/log/* /mnt/@varlog/
There are no hidden files. We list the contents of the source and destination of the move to compare with the previous listing of the contents of these direcories.[root@localhost-live liveuser]# ls -la /mnt/.snapshots/1/snapshot/var/log /mnt/@varlog /mnt/.snapshots/1/snapshot/var/log: total 0 drwxr-xr-x. 1 root root 0 Mar 19 07:20 . drwxr-xr-x. 1 root root 180 Jan 2 00:55 .. /mnt/@varlog: total 1212 drwxr-xr-x. 1 root root 324 Mar 19 07:20 . dr-xr-xr-x. 1 root root 110 Mar 19 07:12 .. drwxr-xr-x. 1 root root 234 Mar 19 06:40 anaconda drwx------. 1 root root 0 Nov 4 00:00 audit drwxr-xr-x. 1 root root 0 Oct 6 00:00 blivet-gui -rw-rw----. 1 root utmp 0 Jan 2 00:51 btmp drwxr-x---. 1 chrony chrony 0 Dec 5 00:00 chrony drwxr-xr-x. 1 root lp 0 Dec 15 00:00 cups -rw-r--r--. 1 root root 377758 Mar 19 06:55 dnf.librepo.log -rw-r--r--. 1 root root 667405 Mar 19 06:55 dnf.log -rw-r--r--. 1 root root 182248 Mar 19 06:55 dnf.rpm.log -rw-r--r--. 1 root root 540 Mar 19 06:55 hawkey.log drwxr-sr-x. 1 root systemd-journal 0 Jan 2 00:51 journal -rw-rw-r--. 1 root utmp 0 Jan 2 00:51 lastlog drwxr-x---. 1 mysql mysql 0 Nov 16 00:00 mariadb drwx------. 1 root root 0 Jul 25 2023 ppp drwx------. 1 root root 0 Jan 2 00:51 private drwxr-xr-x. 1 root root 0 Nov 28 00:00 qemu-ga lrwxrwxrwx. 1 root root 39 Jan 2 00:51 README -> ../../usr/share/doc/systemd/README.logs drwx------. 1 root root 6 Jan 2 00:51 samba drwx------. 1 root root 0 Aug 7 2023 speech-dispatcher drwxr-x---. 1 root root 0 Nov 15 00:00 sssd -rw-------. 1 root root 0 Jan 2 00:51 tallylog -rw-rw-r--. 1 root utmp 0 Jan 2 00:51 wtmp
As expected /mnt/.snapshots/1/snapshot/var/log is not empty and -/mnt/@varlog is populated with the files and directories that were previously in /mnt/.snapshots/1/snapshot/var/log.
Part 5: Modify /etc/fstab
At this point the /etc/fstab is as generated by the Anaconda installer, as shown in the following listing.
#
[root@localhost-live liveuser]# vim /mnt/.snapshots/1/snapshot/etc/fstab


#
# /etc/fstab
# Created by anaconda on Tue Mar 19 06:37:05 2024
#
# Accessible filesystems, by reference, are maintained under '/dev/disk/'.
# See man pages fstab(5), findfs(8), mount(8) and/or blkid(8) for more info.
#
# After editing this file, run 'systemctl daemon-reload' to update systemd
# units generated from this file.
#
UUID=1a773ae9-02a6-4e95-bf07-c500427e652b / btrfs subvol=@-0,compress=zstd:1 0 0
UUID=CEFD-1322 /boot/efi       vfat    umask=0077,shortname=winnt 0 2
UUID=217d430a-c396-4d44-bc53-bd6a063a4a78 /home btrfs subvol=@-1,compress=zstd:1  0 0
Now that we have moved the contents of the subvolume containing the the root of the filesystem hierarchy (/@-0) to the initial snapshot subvolume we created (/@-0/.snapshots/1/snapshot) and from there moved the filesystem hierarchy paths that should be excluded from snapshots to their own subvolumes, we must modify /etc/fstab to include entries that mount these subvolumes to their appropriate mount paths, and to include an entry that mounts the the /@-0/.snapshots subvolume to /.snapshots in order for Snapper to be able to use the subvolume. Also, since we will be setting the initial snapshot as the default subvolume, and using Snapper's capability to set the default subvolume to a new snapshot after rollbacks, we must remove the subvolume identifier from the entry for / from /etc/fstab. This is the native operation with Snapper and the way openSUSE integrates Snapper into its subvolume layout. After we make the modifications to /etc/fstab here, we will reset the default subvolume to the initial snapshot subvolume -- /.snapshots/1/snapshot.
-
Open the fstab file for editing with vim or another editor. Note the path of the file; before the reloaction we would have accessed it at /mnt/etc/fstab, but since the relocation of the root filesystem hierarchy to the newly created initial snapshot subvolume, we access it at /mnt/.snapshots/1/snapshot/etc/fstab.
[root@localhost-live liveuser]# vim /mnt/.snapshots/1/snapshot/etc/fstab
- In the entry for mounting at / delete "subvol=@-0," We can also take this opportunity to modify the mount options, for example, changing compress=zstd:1 to compress=zstd:3. All other default mount options -- which are visible in the output of the mount command -- are acceptable.
-
Add entries to mount the other subvolumes, including the .snapshots subvolume, at the appropriate filesystem hierarchy paths, as shown in the following listing. If the installation is on a laptop and hibernation capability is desired, also add entry for a swap parition. The final result should be similar to the following listing. Comparing it to the previous listing, we see that besides the subvolume entry being missing from the entry for /, each of the subvolumes we created for the filesystem hierarchy paths that should be excluded have their own entries with mountpoints corresponding to the path of their contents. The .snapshots subvolume also has an entry.
# /etc/fstab
# Created by anaconda on Tue Mar 12 22:45:18 2024
# Modified after installation on Tue Mar 13 00:13:00 2024
# Accessible filesystems, by reference, are maintained under '/dev/disk/'.
# See man pages fstab(5), findfs(8), mount(8) and/or blkid(8) for more info.
#
# After editing this file, run 'systemctl daemon-reload' to update systemd
# units generated from this file.
#
UUID=5f58f3a4-ba83-4f77-8e6d-a0325d86fd18       /               btrfs   compress=zstd:3                         0       0
UUID=CEFD-1322                                  /boot/efi       vfat    umask=0077,shortname=winnt              0       2
UUID=86fe8776-bcb9-4891-81a4-0a3b26fe6b20       /home           btrfs   subvol=@-1,compress=zstd:3              0       0
UUID=5f58f3a4-ba83-4f77-8e6d-a0325d86fd18       /.snapshots     btrfs   subvol=@-0/.snapshots,compress=zstd:3   0       0

UUID=5f58f3a4-ba83-4f77-8e6d-a0325d86fd18       /opt            btrfs   subvol=@-0/@opt,compress=zstd:3         0       0
UUID=5f58f3a4-ba83-4f77-8e6d-a0325d86fd18       /root           btrfs   subvol=@-0/@root,compress=zstd:3        0       0
UUID=5f58f3a4-ba83-4f77-8e6d-a0325d86fd18       /srv            btrfs   subvol=@-0/@srv,compress=zstd:3         0       0
UUID=5f58f3a4-ba83-4f77-8e6d-a0325d86fd18       /usr/local      btrfs   subvol=@-0/@usrlocal,compress=zstd:3    0       0
UUID=5f58f3a4-ba83-4f77-8e6d-a0325d86fd18       /var/cache      btrfs   subvol=@-0/@varcache,compress=zstd:3    0       0
UUID=5f58f3a4-ba83-4f77-8e6d-a0325d86fd18       /var/log        btrfs   subvol=@-0/@varlog,compress=zstd:3      0       0
UUID=5f58f3a4-ba83-4f77-8e6d-a0325d86fd18       /var/tmp        btrfs   subvol=@-0/@vartmp,compress=zstd:3      0       0

UUID=980ddbbf-9b79-4390-be21-850e62b7ebb2       none            swap    defaults                                0       0
-
Because the mv command used to move the hidden files and directories of /mnt/ to /mnt/.snapshots/1/snapshot (from the /@-0 subvolume to /@-0/.snpashots/1/snapshot subvolume) could not move the /.snapshots directory -- because it could not move the assocaited subvolume, it was not moved and will not be available at the initial snapshot subvolume where the root of the filesystem hierarchy, /, of the installed system is now located. This directory needs to be at the root of the filesystem hierarchy in our final system so the /@-0/.snapshots subvolume can be mounted to it. So, now we will make the directory in the iniital snapshot subvolume to have it available to mount the subvolume.
[root@localhost-live liveuser]# mkdir /mnt/.snapshots/1/snapshot/.snapshots
.
Part 6: Modify SELinux Mode
By default, a Fedora installation will have the SELinux operating mode set to "enforcing". Unless we make modifications to SELinux configuration, the modifications we have made in the chroot environment will have caused inconsistencies with SELinux's expectations of the filesystem and cause the system boot to hang during the Plymouth animation with an error
[!!!!!!]Failed to allocate manager object
revealed when opening the boot log by pressing [ESC]. We can avoid this issue by settting SELinux's operating mode mode to "permissive". After the system is completely configured, readers who would like to take full advantage of SELinux can change the mode back to "enforcing".
-
Open the SELinux configuration file, /etc/selinux/config in the new initial snapshot subvolume for editing with vim or another editor. The file is accessible in our current set of mounts at /mnt/.snapshots/1/snapshot/etc/selinux/config
[root@localhost-live liveuser]# vim /mnt/.snapshots/1/snapshot/etc/selinux/config
-
Change the line
SELINUX=enforcing
toSELINUX=permissive
# This file controls the state of SELinux on the system.
# SELINUX= can take one of these three values:
#     enforcing - SELinux security policy is enforced.
#     permissive - SELinux prints warnings instead of enforcing.
#     disabled - No SELinux policy is loaded.
# See also:
# https://docs.fedoraproject.org/en-US/quick-docs/getting-started-with-selinux/#getting-started-with-selinux-selinux-states-and-modes
#
# NOTE: In earlier Fedora kernel builds, SELINUX=disabled would also
# fully disable SELinux during boot. If you need a system with SELinux
# fully disabled instead of SELinux running with no policy loaded, you
# need to pass selinux=0 to the kernel command line. You can use grubby
# to persistently set the bootloader to boot with selinux=0:
#
#    grubby --update-kernel ALL --args selinux=0
#
# To revert back to SELinux enabled:
#
#    grubby --update-kernel ALL --remove-args selinux
#
SELINUX=permissive
# SELINUXTYPE= can take one of these three values:
#     targeted - Targeted processes are protected,
#     minimum - Modification of targeted policy. Only selected processes are protected.
#     mls - Multi Level Security protection.
SELINUXTYPE=targeted
Note: Setting SELinux to "permissive" should be enough to avoid the error described above. On the off chance that it is not, SELinux can be completely disabled by rebootign and setting the command line parameter selinux=0.
Part 7: Set the Default Subvolume
When a Btrfs filesystem is created by mkfs, a single subvolume known as the top-level subvolume or main subvolume -- which always has the identifiers subvolid=5, and subvolume path / -- is created. When this subvolume is created it is automatically set as the default subvolume. To use Snapper's capability of automatically setting the current system snapshot as the snapshot to boot from, we must set the initial snapshot subvolume, /@-0/.snapshots/1/snapshot, as the default subvolume. This is the ubvolume we created above, to which we moved the contents of the original subvolume (the one created by the installer to contain the root of the filesystem hierarchy). When a rollback is performed, Snapper will create two new snapshots, one a read-only copy of the current system, and another a read-write copy of the snapshot to which to rollback. The second snapshot will be set as the default subvolume such that subsequent boots will use this as the system root, and the one mounted by /etc/fstab.
-
Switch back to the unprivileged user.
[root@localhost-live liveuser]# exit
exit
-
View the subvolume IDs.
liveuser on localhost-live ~ took 41m16s
❯ sudo btrfs subvolume list /mnt
ID 256 gen 36 top level 5 path @-0
ID 257 gen 30 top level 256 path .snapshots
ID 258 gen 68 top level 257 path .snapshots/1/snapshot
ID 259 gen 30 top level 256 path @opt
ID 260 gen 39 top level 256 path @root
ID 261 gen 30 top level 256 path @srv
ID 262 gen 41 top level 256 path @usrlocal
ID 263 gen 43 top level 256 path @varcache
ID 264 gen 45 top level 256 path @varlog
ID 265 gen 31 top level 256 path @vartmp
From the output, we see that the subvolume /@-0/.snapshots/1/snapshot has a subvolume ID of 258. -
We can see that the default subvolume is currently set to subvolume ID 5 (subvolume path /) the top level subvolume.
liveuser on localhost-live ~
❯ sudo btrfs subvolume get-default /mnt
ID 5 (FS_TREE)
-
Set the default subvolume to /.snapshots/1/snapshot (from the perspective of the filesystem hierarchy itself) or /mnt/.snapshots/1/snapshot (fropm the perspective of our live system with current mounts) or (/@-0/.snapshots/1/snapshot from the perspective of the Btrfs filesystem itslef.
liveuser on localhost-live ~
❯ sudo btrfs subvolume set-default 258 /mnt
The numeric subvolume identifier, i.e. the subvolume ID was used in the above command. According to the btrfs subvolume man page, the subvolume may also be specified by subvolume path, however, an error results that indicates a numeric value should be used, thus the subvolume ID and not subvolume path should be used to identify the subvolume. -
We can see that the new default subvolume with:
liveuser on localhost-live ~
❯ sudo btrfs subvolume get-default /mnt
ID 258 gen 68 top level 257 path @-0/.snapshots/1/snapshot
The default subvolume has changed from subvolume ID 5 (subvolume path /) to subvolume ID 258, subvolume path /@-0/.snapshots/1/snapshot. -
Unmount all mounted subvolumes.
liveuser on localhost-live ~
❯ sudo umount --recursive /mnt
Part 8: chroot Again and Modify the GRUB Configuration
Now we chroot into the installed system again as we did above, this time to modify the GRUB configuration of the installed system. This time, since we have set the initial snapshot subvolume as default, when we moint the Btrfs filesystem on the partition used for the root of the system without any subvolume identifier, the initial snapshot subvolume (subolid=258, subvol=/@-0/.snapshots/1/snapshot will be mounted instead of /@-0.
-
Verify nothing is mounted at /mnt
liveuser on localhost-live ~
❯ mount | grep mnt
-
Mount the iniital snapshot subvolume, the subvolume now containing the root of the filesystem hierarchy (since we moved it from the original in Part 4, above).
liveuser on localhost-live ~
❯ sudo mount UUID="1a773ae9-02a6-4e95-bf07-c500427e652b" /mnt
We can verify that subolid=258, subvol=/@-0/.snapshots/1/snapshot is the one mounted:liveuser on localhost-live ~ ❯ mount | grep mnt /dev/nvme1n1p8 on /mnt type btrfs (rw,relatime,seclabel,ssd,discard=async,space_cache=v2,subvolid=258,subvol=/@-0/.snapshots/1/snapshot)
-
Mount the subvolume containing /home, in this case on a separate Btrfs filesystem on a different partition on a different disk:
liveuser on localhost-live ~
❯ sudo mount UUID="217d430a-c396-4d44-bc53-bd6a063a4a78" /mnt/home -o subvol=/@-1
-
Mount the subvolumes used to contain filesystem hierarchy paths that are excluded from the system snapshots:
liveuser on localhost-live ~
❯ sudo mount UUID="1a773ae9-02a6-4e95-bf07-c500427e652b" /mnt/opt -o subvol=/@-0/@opt

liveuser on localhost-live ~
❯ sudo mount UUID="1a773ae9-02a6-4e95-bf07-c500427e652b" /mnt/root -o subvol=/@-0/@root

liveuser on localhost-live ~
❯ sudo mount UUID="1a773ae9-02a6-4e95-bf07-c500427e652b" /mnt/srv -o subvol=/@-0/@srv

liveuser on localhost-live ~
❯ sudo mount UUID="1a773ae9-02a6-4e95-bf07-c500427e652b" /mnt/usr/local -o subvol=/@-0/@usrlocal

liveuser on localhost-live ~
❯ sudo mount UUID="1a773ae9-02a6-4e95-bf07-c500427e652b" /mnt/var/cache -o subvol=/@-0/@varcache

liveuser on localhost-live ~
❯ sudo mount UUID="1a773ae9-02a6-4e95-bf07-c500427e652b" /mnt/var/log -o subvol=/@-0/@varlog

liveuser on localhost-live ~
❯ sudo mount UUID="1a773ae9-02a6-4e95-bf07-c500427e652b" /mnt/var/tmp -o subvol=/@-0/@vartmp
-
Mount the ESP:
liveuser on localhost-live ~
❯ sudo mount UUID="CEFD-1322" /mnt/boot/efi
-
Mount the pseudo filesystems:
liveuser on localhost-live ~
❯ sudo mount --bind /dev /mnt/dev

liveuser on localhost-live ~
❯ sudo mount -t proc /proc /mnt/proc

liveuser on localhost-live ~
❯ sudo mount -t sysfs /sys /mnt/sys

liveuser on localhost-live ~
❯ sudo mount -t tmpfs tmpfs /mnt/run

liveuser on localhost-live ~
❯ sudo mount -o bind /dev/pts /mnt/dev/pts

liveuser on localhost-live ~
❯ sudo mount -o bind /sys/firmware/efi/efivars /mnt/sys/firmware/efi/efivars
-
Copy /etc/resolv.conf to the installed system:
liveuser on localhost-live ~
❯ sudo cp /etc/resolv.conf /mnt/etc/resolv.conf
-
chroot into installed system:
liveuser on localhost-live ~
❯ sudo chroot /mnt /usr/bin/bash
[root@localhost-live /]#
-
Disable GRUB BLS. GRUB BLS is an effort to standardize GRUB for multiple platforms, some as different from x86_64 as S390, by replacing elements of the traditional GRUB configuration with drop in "scriptlets" for each platform. Unfortunately, a GRUB BLS configuration interferes with grub-btrfs's functionality of creating and displaying a GRUB submenu of read-only system snapshots into which the system can be booted to initiate rollbacks to the selected snapshot. First, open /etc/default/grub for editing with vim or another editor:
[root@localhost-live /]# vim /etc/default/grub
Modify the file so that the lineGRUB_ENABLE_BLSCFG=true
becomesGRUB_ENABLE_BLSCFG="false"
-
Optimonally, modify /etc/default/grub to include:
SUSE_BTRFS_SNAPSHOT_BOOTING="true"
If this parameter is included in /etc/default/grub, it will allow GRUB to use relative paths when searching for kernels to boot by setting the relevant parameter found in one of the grub2-mkconfig sourced scripts, /etc/grub.d/00_header, to be set, as shown in the following listing.if [ "x${SUSE_BTRFS_SNAPSHOT_BOOTING}" = "xtrue" ] && [ "x${GRUB_FS}" = "xbtrfs" ] ; then cat <The result will be that the paths to the kernel in the GRUB kernel command-line will not include the subvolume path, i.e., they will look like/boot/vmlinuz-6.7.6-200.fc39.x86_64
instead of/@-0/.snapshots/1/snapshot/boot/vmlinuz-6.7.6-200.fc39.x86_64
In my opinion, the latter is preferable. When absolute subvolume paths are used, it allows editing the GRUB configuration to specify a specific snapshot and a kernel path for the boot. This is helpful if there is an unexpected problem with the GRUB configuration. -
The GRUB BLS configuration uses a directory /boot/loader/entries, which contains files associated with available kernels for use with a GRUB BLS configuration (see following image).
Remove the directory:
 The Contents of /boot/loader/entries as Listed from the chroot to the Installed SystemThese files are used by the GRUB BLS configuration, which must be removed for grub-btrfs to function.
[root@localhost-live /]# rm -r /boot/loader
rm: descend into directory '/boot/loader'? y
rm: descend into directory '/boot/loader/entries'? y
rm: remove regular file '/boot/loader/entries/a6c93ae8fb4347699af7cd22cd207c55-6.6.8-200.fc39.x86_64.conf'? y
rm: remove regular file '/boot/loader/entries/a6c93ae8fb4347699af7cd22cd207c55-0-rescue.conf'? y
rm: remove directory '/boot/loader/entries'? y
rm: remove directory '/boot/loader'? y
-
Remove the existing GRUB environment which contains variables related to the previous BLS configuration.
[root@localhost-live /]# rm /boot/grub2/grubenv
rm: remove regular file '/boot/grub2/grubenv'? y
-
Update the GRUB configuration.
[root@localhost-live /]# grub2-mkconfig -o /boot/grub2/grub.cfg
Generating grub configuration file ...
Found linux image: /boot/vmlinuz-6.6.8-200.fc39.x86_64
Found initrd image: /boot/initramfs-6.6.8-200.fc39.x86_64.img
fgrep: warning: fgrep is obsolescent; using grep -F
Found linux image: /boot/vmlinuz-0-rescue-a6c93ae8fb4347699af7cd22cd207c55
Found initrd image: /boot/initramfs-0-rescue-a6c93ae8fb4347699af7cd22cd207c55.img
fgrep: warning: fgrep is obsolescent; using grep -F
Found openSUSE Tumbleweed on /dev/nvme1n1p5
Found Arch Linux on /dev/nvme1n1p6
Found Ubuntu 23.10 (23.10) on /dev/nvme1n1p7
Found Garuda Linux on /dev/nvme1n1p9
Adding boot menu entry for UEFI Firmware Settings ...
done
We can now reboot the system. When we reboot (see Booting Issues, below, for possible booting issues and resolutions), the system root will be the subvolume we set as the default subvolume, at subvolume path /@-0/.snapshots/1/snapshot, with filesystem hierarchy paths excluded from root snapshots mounted from their respective separate subvolumes, as we specified in /etc/fstab. After the reboot we will continue the remaining steps of the system configuration by installing the the DNF Snapper plugin and grub-btrfs.
Part 9: Install Snapper DNF Plugin
At this point in the process the subvolume layout of our Fedora system is as we want it, in the same layout as openSUSE. The system boots from a snapshot subvolume contained within the /@-0/.snapshots subvolume, specifically the /@-0/.snapshots/1/snapshot subvolume, as this has been set as the default Btrfs subvolume for the Btrfs filesystem on the partition.
In this step we will install the DNF plugin package python3-dnf-plugin-snapper, which will cause snapshots to be created automatically by Snapper immediately before and immediately after package managment transactions (this serves the same role as the snap-pac package in Arch as described in An Arch Linux Installation on a Btrfs Filesystem with Snapper for System Snapshots and Rollbacks)
To compare the effect of this package on our system, the currently existing Snapper snapshots are shown below; at this point, before installing the plugin, there is only one, an apparently dummy snapshot created at Snapper initialization (there is no directory /.snapshots/0).
79% 14:47:12 USER: brook HOST: Ultramarine-16ITH6 ~ ❯$ sudo snapper list # | Type | Pre # | Date | User | Cleanup | Description | Userdata ---+--------+-------+------+------+---------+-------------+--------- 0 | single | | | root | | current |
-
Install the Snapper DNF plugin.
79% 14:47:43 USER: brook HOST: Ultramarine-16ITH6 ~ ❯$ sudo dnf install python3-dnf-plugin-snapper [sudo] password for brook: Fedora 39 - x86_64 - Updates 17 kB/s | 22 kB 00:01 Fedora 39 - x86_64 - Updates 323 kB/s | 2.7 MB 00:08 google-chrome 1.3 kB/s | 1.3 kB 00:01 RPM Fusion for Fedora 39 - Free - Updates 4.1 kB/s | 3.6 kB 00:00 RPM Fusion for Fedora 39 - Free - Updates 116 kB/s | 241 kB 00:02 RPM Fusion for Fedora 39 - Nonfree - Updates 11 kB/s | 6.5 kB 00:00 RPM Fusion for Fedora 39 - Nonfree - Updates 33 kB/s | 86 kB 00:02 Terra Packages 39 142 B/s | 281 B 00:01 Terra Packages 39 59 kB/s | 202 kB 00:03 Ultramarine Linux 39 139 B/s | 281 B 00:02 Dependencies resolved. ========================================================================================================= Package Architecture Version Repository Size ========================================================================================================= Installing: python3-dnf-plugin-snapper noarch 4.1.2-1.fc39 updates 14 k Installing dependencies: python3-dnf-plugins-extras-common noarch 4.1.2-1.fc39 updates 47 k Transaction Summary ========================================================================================================= Install 2 Packages Total download size: 60 k Installed size: 105 k Is this ok [Y/n]: Downloading Packages: (1/2): python3-dnf-plugin-snapper-4.1.2-1.fc39.noarch.rpm 16 kB/s | 14 kB 00:00 (2/2): python3-dnf-plugins-extras-common-4.1.2-1.fc39.noarch.rpm 47 kB/s | 47 kB 00:00 --------------------------------------------------------------------------------------------------------- Total 28 kB/s | 60 kB 00:02 Running transaction check Transaction check succeeded. Running transaction test Transaction test succeeded. Running transaction Preparing : 1/1 Installing : python3-dnf-plugins-extras-common-4.1.2-1.fc39.noarch 1/2 Installing : python3-dnf-plugin-snapper-4.1.2-1.fc39.noarch 2/2 Running scriptlet: python3-dnf-plugin-snapper-4.1.2-1.fc39.noarch 2/2 Verifying : python3-dnf-plugin-snapper-4.1.2-1.fc39.noarch 1/2 Verifying : python3-dnf-plugins-extras-common-4.1.2-1.fc39.noarch 2/2 Installed: python3-dnf-plugin-snapper-4.1.2-1.fc39.noarch python3-dnf-plugins-extras-common-4.1.2-1.fc39.noarch Complete!
Now that the plugin is installed, if we perform some package management tasks, the Snapper snapshot list will have more entries, as shown in the following listing.
97% 15:11:46 USER: brook HOST: Ultramarine-16ITH6 PCD: 4m56s ~ ❯$ sudo snapper list [sudo] password for brook: # | Type | Pre # | Date | User | Cleanup | Description | Userdata ---+--------+-------+---------------------------------+------+---------+-------------------------------+--------- 0 | single | | | root | | current | 2 | pre | | Mon 25 Mar 2024 03:01:02 PM EDT | root | number | /usr/bin/dnf install kontact | 3 | post | 2 | Mon 25 Mar 2024 03:01:20 PM EDT | root | number | /usr/bin/dnf install kontact | 4 | pre | | Mon 25 Mar 2024 03:05:51 PM EDT | root | number | /usr/bin/dnf install kdenlive | 5 | post | 4 | Mon 25 Mar 2024 03:05:59 PM EDT | root | number | /usr/bin/dnf install kdenlive | 6 | pre | | Mon 25 Mar 2024 03:11:25 PM EDT | root | number | /usr/bin/dnf upgrade | 7 | post | 6 | Mon 25 Mar 2024 03:11:46 PM EDT | root | number | /usr/bin/dnf upgrade |
The initial snapshot #1, which is the subvolume thaat contains are system root (at subvolume path /@-0/.snapshots/1/snpahot) is not shown in the listing. But three pairs of new snapshots are listed, each pair made by the DNF Snapper plugin and Snapper as a result of a package management transaction, the first of each pair being a snapshot made before any changes by the transaction, and the second being a snapshot made after changes to the system by the transaction.
We could at this point perform rollbacks to the system from any of these snapshots replacing the subvolume mounted at / -- currently /@-0/.snapshots/1/snapshot -- with one of the one selected for rollback, e.g., /@-0/.snapshots/6/snapshot. As mentioned before, although the subvolume is not explicitly specified in /etc/fstab the selected snaphsot will be the one booted because Snapper will set it as the new default Btrfs subvolume after a rollback. In the current state of the system, We would either have to initiate the rollback from within a potentially broken system or boot by editing the GRUB commandline to boot from the desired snapshot. But after the next step where we install gruib-btrfs, this will not be necessary as the available snapshots will be selectable from the GRUB menu.
Part 10: Install and Configure grub-btrfs
At this stage of the process, snapshots are automatically created during DNF package transactions, and we could also create snapshots manually. But the two methods of initiating a rollback available now might be complicated. We have two options to initiate the rollback.
- We could initiate a rollback from within the current system, a potentially broken one, by issuing a snapper rollback command which specifies the snapshot number to which to rollback. After reboot, the kernel commadn line of the default GRUB menu item would have to be edited to reflect the path of the new read-write snapshot (that new rolled-back system), ensuring the correct kernel image is specified -- including the kernel version. The GRUB configuration would then need to be updated with grub2-mkconfig.
- We could initiate a rollback by booting from a read-only snapshot, which at this point would require editing the kernel command line to reflect the correct path to the subvolume, i.e., the XX in the specified path /@-0/.snapshots/XX/snapshot/boot/vmlinuz-l.m.m... would have to match the snapshot to which to rollback; the kernel version (vmlinuz-l.m.n...) would also have to be the reflect the kernel image version in the snapshot to which to rollback. In the booted read-only system, we would then issue the snapper rollback command wothout having to specify the snapshot to which to rollback.
But after we install grub-btrfs in this step of the process,the process will be much simpler. A new submenu will be added to GRUB titled "Fedora Linux Snapshots" -- or in the case of this Fedora based distribution used as the reference for the article, "Ultramarine Linux Snapshots" -- from which we will be able to select a read-only snapshot to boot into. The selected snapshot from this menu will be the one to which the system will be rolled back when issuing the snapper rollback command from withing th read-only snapshot.
A package is not available for grub-btrfs in the normal Fedora repositories. A Fedora COPR repository -- kylegospo/grub-btrfs is available for grub-btrfs, but nfortunately, it hasn't been maintained for some time, so we will have to install it manually from a clone of the project's GitHub repository.
-
Clone the grub-btrfs GitHub repository.
84% 14:52:45 USER: brook HOST: Ultramarine-16ITH6 PCD: 1m14s ~ ❯$ git clone https://github.com/Antynea/grub-btrfs.git Cloning into 'grub-btrfs'... remote: Enumerating objects: 1268, done. remote: Counting objects: 100% (341/341), done. remote: Compressing objects: 100% (145/145), done. remote: Total 1268 (delta 240), reused 261 (delta 192), pack-reused 927 Receiving objects: 100% (1268/1268), 407.93 KiB | 720.00 KiB/s, done. Resolving deltas: 100% (757/757), done.
-
Change directory to the cloned repository.
84% 14:53:27 USER: brook HOST: Ultramarine-16ITH6 PCD: 2s ~ ❯$ cd grub-btrfs
The contents of the directory are shown in the following listing. 86% 14:55:53 USER: brook HOST: Ultramarine-16ITH6 on master [!] PCD: 57s grub-btrfs ❯$ ls -la total 128 drwxr-xr-x. 1 brook brook 312 Mar 25 14:55 . drwx------. 1 brook brook 494 Mar 25 14:56 .. -rwxr-xr-x. 1 brook brook 28843 Mar 25 14:53 41_snapshots-btrfs -rw-r--r--. 1 brook brook 148 Mar 25 14:53 .codespellrc -rw-r--r--. 1 brook brook 6738 Mar 25 14:53 config drwxr-xr-x. 1 brook brook 138 Mar 25 14:53 .git drwxr-xr-x. 1 brook brook 18 Mar 25 14:53 .github -rwxr-xr-x. 1 brook brook 11809 Mar 25 14:53 grub-btrfsd -rw-r--r--. 1 brook brook 823 Mar 25 14:53 grub-btrfsd.confd -rwxr-xr-x. 1 brook brook 305 Mar 25 14:53 grub-btrfsd.initd -rw-r--r--. 1 brook brook 910 Mar 25 14:53 grub-btrfsd.service drwxr-xr-x. 1 brook brook 38 Mar 25 14:53 initramfs -rw-r--r--. 1 brook brook 35121 Mar 25 14:53 LICENSE -rw-r--r--. 1 brook brook 7587 Mar 25 14:55 Makefile drwxr-xr-x. 1 brook brook 132 Mar 25 14:53 manpages -rw-r--r--. 1 brook brook 15294 Mar 25 14:53 README.md drwxr-xr-x. 1 brook brook 50 Mar 25 14:53 temp
-
Optionally, edit the Makefile found in the directory.
85% 14:53:54 USER: brook HOST: Ultramarine-16ITH6 on master grub-btrfs ❯$ vim Makefile
It is preferable to specify the value of the prefix variable to /usr/local instead of /usr to better conform to filesystem hierarchy standards. ChangePREFIX ?= /usr
toPREFIX ?= /usr/local
-
More importantly, it is necessary to edit the config file also in the same directory in order to make the installation compatible with Fedora's GRUB related filesystem hierarchy paths. Modifying, values in this one file before installation will save us the work of modifying multiple files after installation.
-
Uncomment Line 103 (in the version of grub-btrfs that is current on the date of this writing) and modify the parameter value, so that the original,
#GRUB_BTRFS_GRUB_DIRNAME="/boot/grub2
becomesGRUB_BTRFS_GRUB_DIRNAME="/boot/grub2
-
Uncomment Line 115 (in the current version of grub-btrfs) and modify the parameter value so that the original,
#GRUB-BTRFS_GBTRFS_DIRNAME="/boot/grub"
becomesGRUB-BTRFS_GBTRFS_DIRNAME="/boot/grub2"
-
Uncomment Line 135 (in the current version of grub-btrfs) and modify the parameter value so that the original,
#GRUB_BTRFS_MKCONFIG=/usr/bin/grub2-mkconfig
becomesGRUB_BTRFS_MKCONFIG=/usr/sbin/grub2-mkconfig
-
Uncomment Line 141 (in the current version of grub-btrfs) so that the original,
#GRUB_BTRFS_SCRIPT_CHECK=grub2-script-check
becomesGRUB_BTRFS_SCRIPT_CHECK=grub2-script-check
-
Uncomment Line 103 (in the version of grub-btrfs that is current on the date of this writing) and modify the parameter value, so that the original,
-
Install grub-btrfs.
15:26:35 USER: brook HOST: Ultramarine-16ITH6 on master [!] PCD: 1m39s grub-btrfs ❯$ sudo make install
The command with its output:15:26:35 USER: brook HOST: Ultramarine-16ITH6 on master [!] PCD: 1m39s grub-btrfs ❯$ sudo make install [sudo] password for brook: Installing :::::::: ::::::::: ::: ::: ::::::::: ::::::::: ::::::::::: ::::::::: :::::::::: :::::::: :+: :+: :+: :+: :+: :+: :+: :+: :+: :+: :+: :+: :+: :+: :+: :+: +:+ +:+ +:+ +:+ +:+ +:+ +:+ +:+ +:+ +:+ +:+ +:+ +:+ +:+ :#: +#++:++#: +#+ +:+ +#++:++#+ +#++:++#++:++ +#++:++#+ +#+ +#++:++#: :#::+::# +#++:++#++ +#+ +#+# +#+ +#+ +#+ +#+ +#+ +#+ +#+ +#+ +#+ +#+ +#+ +#+ +#+ #+# #+# #+# #+# #+# #+# #+# #+# #+# #+# #+# #+# #+# #+# #+# #+# ######## ### ### ######## ######### ######### ### ### ### ### ######## For further information visit https://github.com/Antynea/grub-btrfs or read the man page: 'man grub-btrfs' Installing manpages... Installing systemd .service file Installing docs... Updating the GRUB menu... Generating grub configuration file ... Found linux image: /boot/vmlinuz-6.7.9-200.fc39.x86_64 Found initrd image: /boot/initramfs-6.7.9-200.fc39.x86_64.img fgrep: warning: fgrep is obsolescent; using grep -F Found linux image: /boot/vmlinuz-6.6.8-200.fc39.x86_64 Found initrd image: /boot/initramfs-6.6.8-200.fc39.x86_64.img fgrep: warning: fgrep is obsolescent; using grep -F Found linux image: /boot/vmlinuz-0-rescue-a6c93ae8fb4347699af7cd22cd207c55 Found initrd image: /boot/initramfs-0-rescue-a6c93ae8fb4347699af7cd22cd207c55.img fgrep: warning: fgrep is obsolescent; using grep -F Found Windows Boot Manager on /dev/nvme1n1p1@/EFI/Microsoft/Boot/bootmgfw.efi Found openSUSE Tumbleweed on /dev/nvme1n1p5 Found Arch Linux on /dev/nvme1n1p6 Found Ubuntu 23.10 (23.10) on /dev/nvme1n1p7 Found Garuda Linux on /dev/nvme1n1p9 Adding boot menu entry for UEFI Firmware Settings ... Detecting snapshots ... Found snapshot: 2024-03-25 15:11:46 | @-0/.snapshots/7/snapshot | post | /usr/bin/dnf upgrade | Found snapshot: 2024-03-25 15:11:25 | @-0/.snapshots/6/snapshot | pre | /usr/bin/dnf upgrade | Found snapshot: 2024-03-25 15:05:59 | @-0/.snapshots/5/snapshot | post | /usr/bin/dnf install kdenlive | Found snapshot: 2024-03-25 15:05:51 | @-0/.snapshots/4/snapshot | pre | /usr/bin/dnf install kdenlive | Found snapshot: 2024-03-25 15:01:20 | @-0/.snapshots/3/snapshot | post | /usr/bin/dnf install kontact | Found snapshot: 2024-03-25 15:01:02 | @-0/.snapshots/2/snapshot | pre | /usr/bin/dnf install kontact | Found 6 snapshot(s) WARNING: '/usr/sbin/grub2-mkconfig' needs to run at least once to generate the snapshots (sub)menu entry in grub the main menu. After that this script can run alone to generate the snapshot entries. Unmount /tmp/grub-btrfs.MQ4d9WlZKp .. Success Done -
Update the GRUB configuration to incorporate all of our changes to it.
15:28:13 USER: brook HOST: Ultramarine-16ITH6 on master [!] PCD: 55s grub-btrfs ❯$ sudo grub2-mkconfig -o /boot/grub2/grub.cfg
The command with its output:15:28:13 USER: brook HOST: Ultramarine-16ITH6 on master [!] PCD: 55s grub-btrfs ❯$ sudo grub2-mkconfig -o /boot/grub2/grub.cfg Generating grub configuration file ... Found linux image: /boot/vmlinuz-6.7.9-200.fc39.x86_64 Found initrd image: /boot/initramfs-6.7.9-200.fc39.x86_64.img fgrep: warning: fgrep is obsolescent; using grep -F Found linux image: /boot/vmlinuz-6.6.8-200.fc39.x86_64 Found initrd image: /boot/initramfs-6.6.8-200.fc39.x86_64.img fgrep: warning: fgrep is obsolescent; using grep -F Found linux image: /boot/vmlinuz-0-rescue-a6c93ae8fb4347699af7cd22cd207c55 Found initrd image: /boot/initramfs-0-rescue-a6c93ae8fb4347699af7cd22cd207c55.img fgrep: warning: fgrep is obsolescent; using grep -F Found Windows Boot Manager on /dev/nvme1n1p1@/EFI/Microsoft/Boot/bootmgfw.efi Found openSUSE Tumbleweed on /dev/nvme1n1p5 Found Arch Linux on /dev/nvme1n1p6 Found Ubuntu 23.10 (23.10) on /dev/nvme1n1p7 Found Garuda Linux on /dev/nvme1n1p9 Adding boot menu entry for UEFI Firmware Settings ... Detecting snapshots ... Found snapshot: 2024-03-25 15:11:46 | @-0/.snapshots/7/snapshot | post | /usr/bin/dnf upgrade | Found snapshot: 2024-03-25 15:11:25 | @-0/.snapshots/6/snapshot | pre | /usr/bin/dnf upgrade | Found snapshot: 2024-03-25 15:05:59 | @-0/.snapshots/5/snapshot | post | /usr/bin/dnf install kdenlive | Found snapshot: 2024-03-25 15:05:51 | @-0/.snapshots/4/snapshot | pre | /usr/bin/dnf install kdenlive | Found snapshot: 2024-03-25 15:01:20 | @-0/.snapshots/3/snapshot | post | /usr/bin/dnf install kontact | Found snapshot: 2024-03-25 15:01:02 | @-0/.snapshots/2/snapshot | pre | /usr/bin/dnf install kontact | Found 6 snapshot(s) Unmount /tmp/grub-btrfs.XW3rkhHVc0 .. Success done
-
Enable the grub-btrfsd.service
100% 16:07:14 USER: brook HOST: Ultramarine-16ITH6 ~ ❯$ sudo systemctl enable grub-btrfsd.service Created symlink /etc/systemd/system/multi-user.target.wants/grub-btrfsd.service → /usr/local/lib/systemd/system/grub-btrfsd.service.
Except for a few minor details regarding the automating maintenance of the Btrfs and automating the cleanup of old snapshots, our configuration of a Fedora system with a Btrfs subvolume layout in the openSUSE style with Snapper configured to take advantage of all of its capabilities is complete. The normal GRUB menu items, even after rollbacks, will boot into the correct snapshot subvolume. For initiating rollbacks a new GRUB submenu is available that will allow us to select a read-only snapshot to boot into. The final state of the GRUB menu is shown in the following set of images.

-

-

-

-
 <
< -

-


The GRUB Menu After Installation of grub-btrfs
grub-btrfs adds a new submenu to the main GRUB menu with the heading Fedora Linux snapshots or, as in the case of the Fedora based reference sytem for this article.
Click on any of the thumbnails to view a slideshow of the images.
Click on any of the thumbnails to view a slideshow of the images.
Part 11: Final Configuration
At this point our Fedora system is configured with a Btrfs subvolume layour in the openSUSE style with Snapper fully integrated for manageing snapshots. One of the snapshots in the subvolume /@-0/.snapshots/, the one set as the default subvolume will always be automatically mounted as the root file syste. We have set the default subvolume to be the one we created and to which we moved the contents of the subvolume created by Anaconda during installation, /@-0, with the exception of filesystem hierarchy paths that should be excluded from snapshots; these have been moved to their own subvolumes. The GRUB menu now includes a menu item which can be expandded to show a submenu of available snapshots into which we can boot to initiate a rollback. Snapshots are automatically created during package management transactions and are automatically added to the GRUB menu.
The only remaining tasks are minor ones: we can refine the Snapper configuration of snapshot management of our root filesystem, in the file /etc/snapper/configs/root where we can specify the frequencey of automatic snapshot cleanup and creation, apart from those created during DNF package maanagement transactions; and we can automate the maintenance of the Btrfs filesystem by enabling services to perioducally scrub and balance the filesyste. Both of these final configuration tasks can be easily performed by Btrfs Assistant, a GUI which can be used to manage the Snapper and some aspects of the filesyste. The installation and use of Btrfs Assistant to modify the relevant settings and enable the relevant services is described below.
-
Install the btrfs-assistant package.
100% 17:28:32 USER: brook HOST: Ultramarine-16ITH6 ~ ❯$ sudo dnf install btrfs-assistant Last metadata expiration check: 1:40:35 ago on Tue 26 Mar 2024 03:51:10 PM EDT. Dependencies resolved. ============================================================================================================================ Package Architecture Version Repository Size ============================================================================================================================ Installing: btrfs-assistant x86_64 1.9-1.fc39 updates 180 k Installing dependencies: libbtrfsutil x86_64 6.7.1-1.fc39 updates 32 k Installing weak dependencies: btrfsmaintenance noarch 0.5-8.fc39 fedora 34 k Transaction Summary ============================================================================================================================ Install 3 Packages Total download size: 246 k Installed size: 633 k Is this ok [Y/n]: Downloading Packages: (1/3): libbtrfsutil-6.7.1-1.fc39.x86_64.rpm 155 kB/s | 32 kB 00:00 (2/3): btrfsmaintenance-0.5-8.fc39.noarch.rpm 115 kB/s | 34 kB 00:00 (3/3): btrfs-assistant-1.9-1.fc39.x86_64.rpm 514 kB/s | 180 kB 00:00 ---------------------------------------------------------------------------------------------------------------------------- Total 252 kB/s | 246 kB 00:00 Running transaction check Transaction check succeeded. Running transaction test Transaction test succeeded. Running transaction Preparing : 1/1 Installing : libbtrfsutil-6.7.1-1.fc39.x86_64 1/3 Installing : btrfsmaintenance-0.5-8.fc39.noarch 2/3 Running scriptlet: btrfsmaintenance-0.5-8.fc39.noarch 2/3 Installing : btrfs-assistant-1.9-1.fc39.x86_64 3/3 Running scriptlet: btrfs-assistant-1.9-1.fc39.x86_64 3/3 Verifying : btrfsmaintenance-0.5-8.fc39.noarch 1/3 Verifying : btrfs-assistant-1.9-1.fc39.x86_64 2/3 Verifying : libbtrfsutil-6.7.1-1.fc39.x86_64 3/3 Installed: btrfs-assistant-1.9-1.fc39.x86_64 btrfsmaintenance-0.5-8.fc39.noarch libbtrfsutil-6.7.1-1.fc39.x86_64 Complete!
-
Modify the /etc/snapper/configs/root values of configuration parameters TIMELINE_LIMIT_HOURLY, TIMELINE_LIMIT_DAILY, TIMELINE_LIMIT_WEEKLY, TIMELINE_LIMIT_MONTHLY, and TIMELINE_LIMIT_YEARLY to appropriate values. The values of these parameters specify how many of each type of snapshot indicated by the name of the parameter are kept when snapshots are cleanded up. I changed each of these values (I changed each of the values to "1"). The values in the file can be changed in the Snapper Settings tab of BTRFS ASSISTANT, as shown in the following image. Note that the "Select config" dropdown item is the same as the configuration file name which corresponds to the name of the configruation we created when we initialized Snapper. If we created a configuration to create snapshots of a subvolume containing the user home, the appropriate configuraiton would have to be selected.
 Modifying the Snapper Configuration File Parameters Using the Btrfs Assistant GUI
 -
Enable the Snapper helper systemd timers snapper-boot.timer, snapper-timeline.timer, and snapper-cleanup.timer which, respectively, create a snapshot automatically at boot, create hourly, daily, weekly, and monthly periodic snapshots, and delete old snapshots -- keeping the specified number of each type of periodic snapshot and the total number, as specified in other configuraiton parameters. These timers can be enabled using the systemd enable command, or more conveniently along with other configuration modifications, through Btrfs Assistant by activating the checkboxes in the Snapper Settings tab of Btrfs Assistant, in the section systemd Unit Settings and clicking the Apply systemd changes.
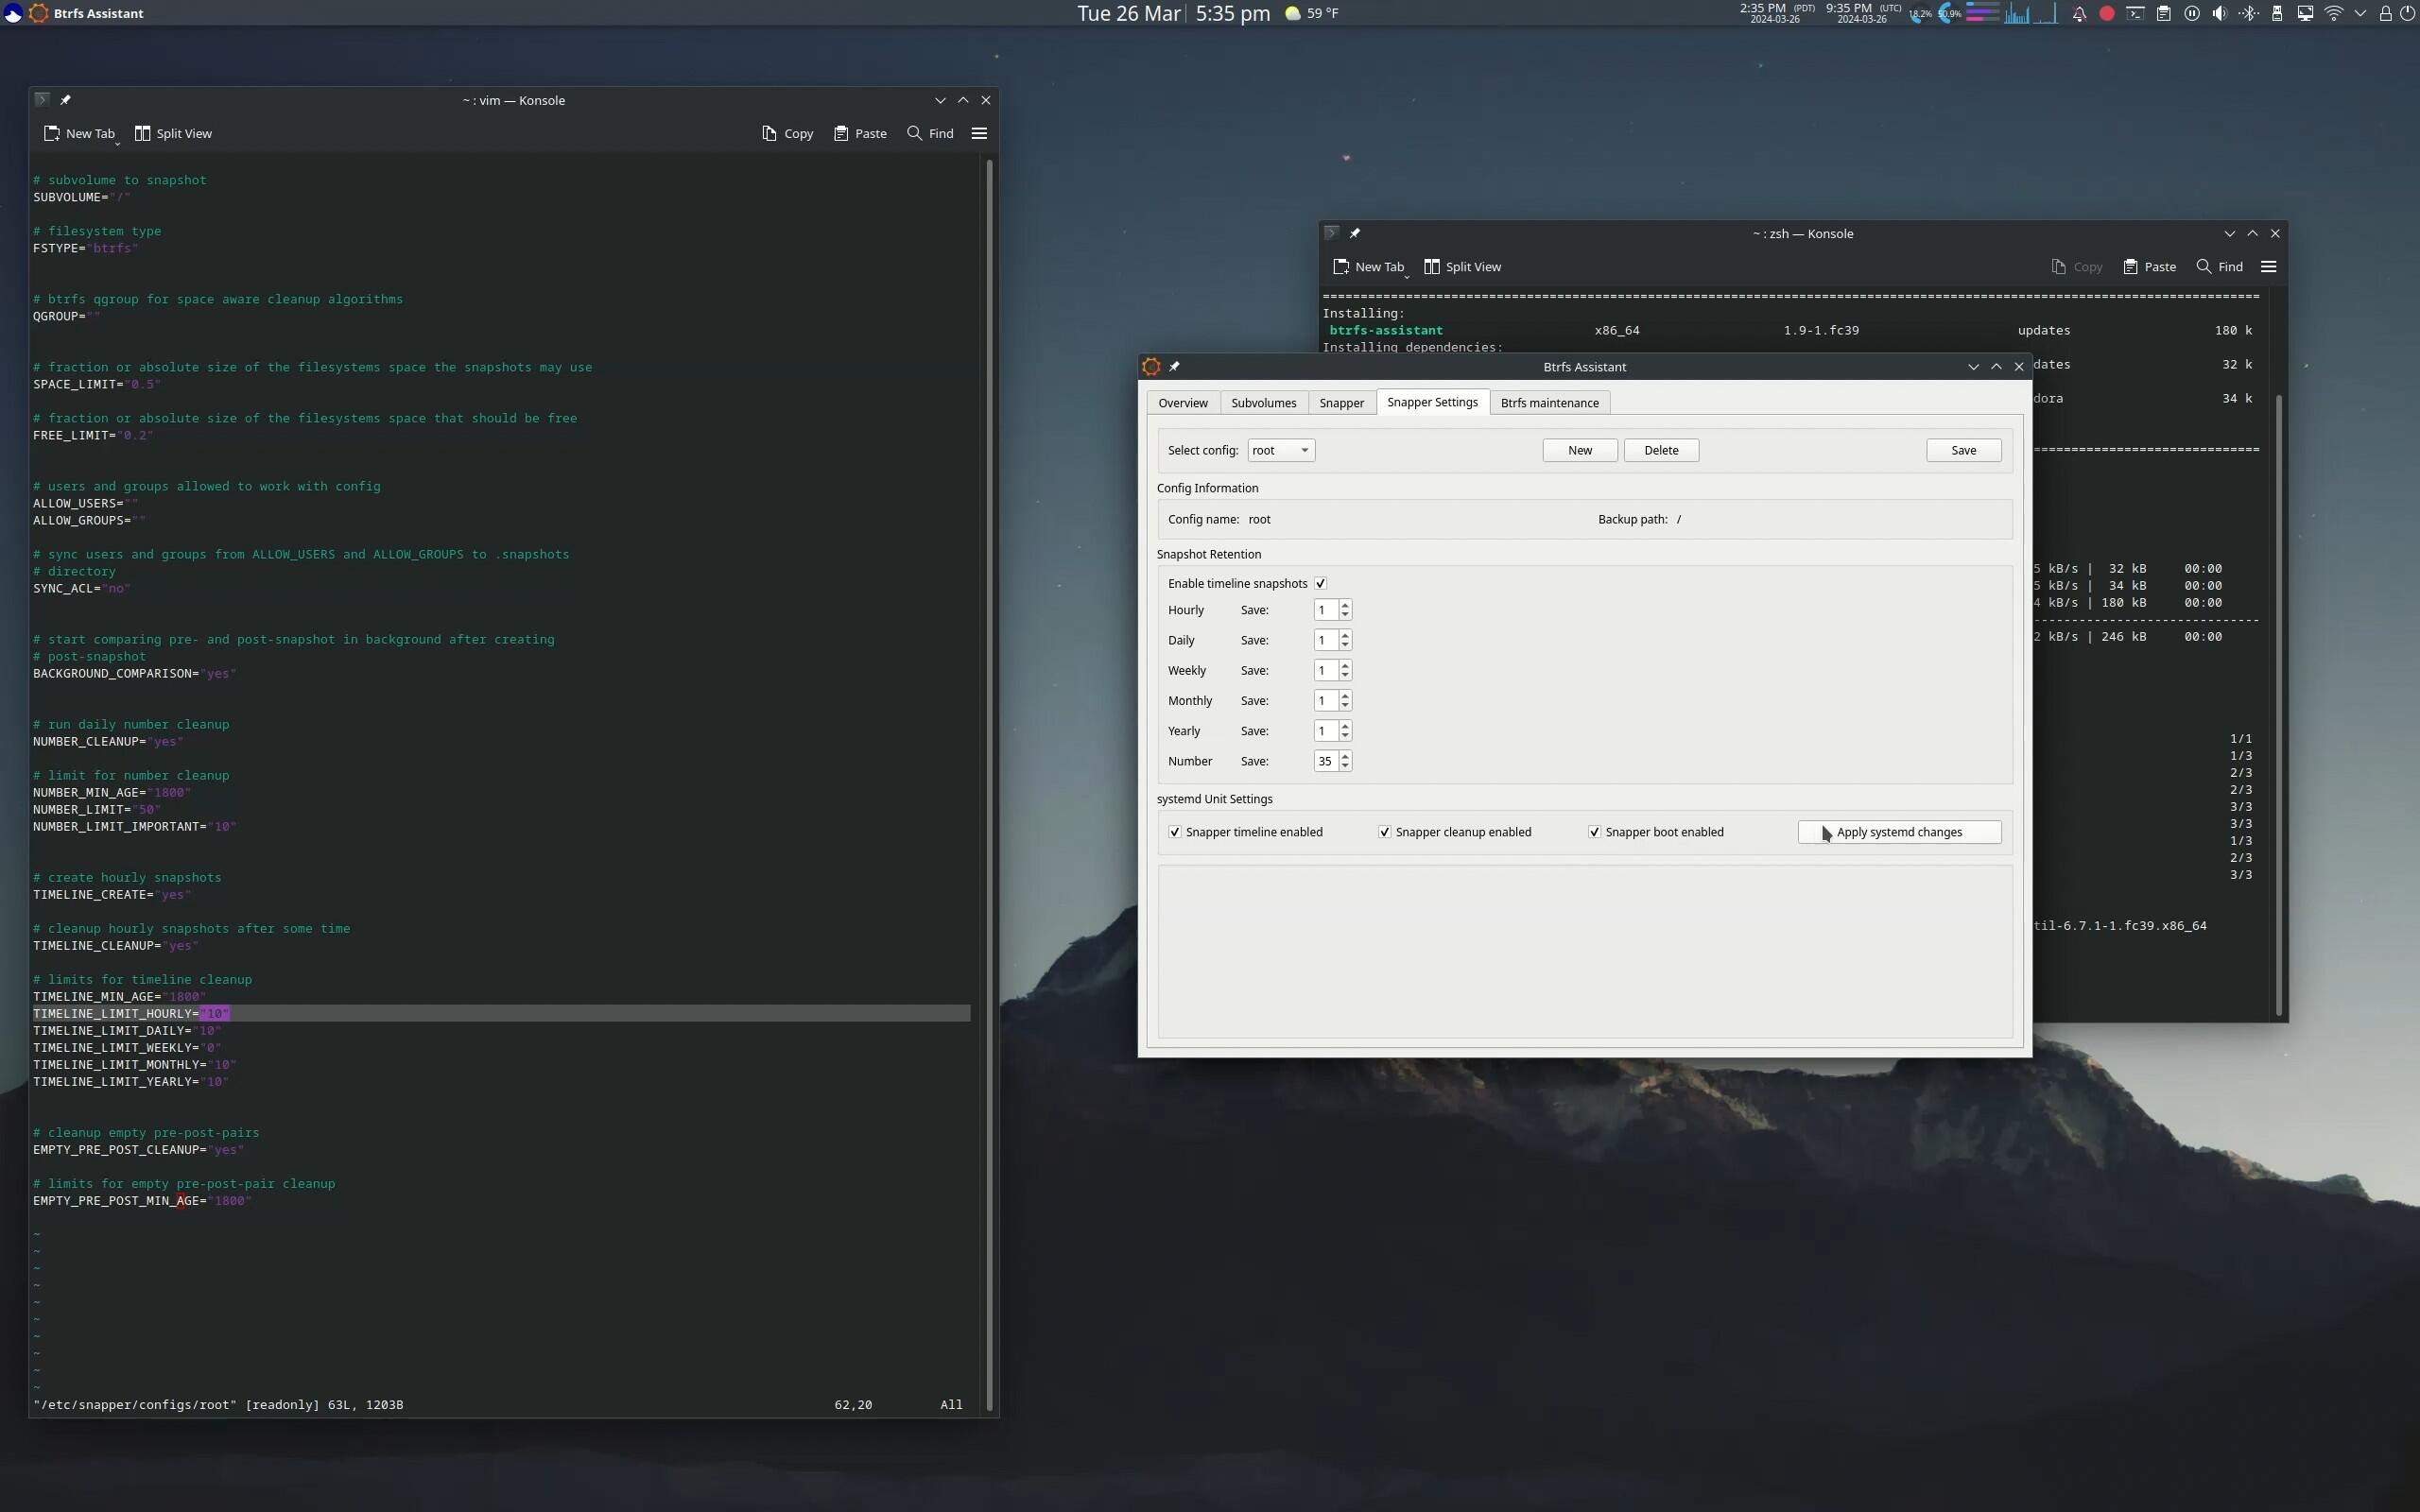 Modifying the Snapper Configuration File Parameters Using the Btrfs Assistant GUI
 -
Enable the Btrfs maintenance timers btrfs-balance.timer, btrfs-scrub.timer, btrfs-defrag.timer. First, check the status of these timers with systemd status and determine whether they are already enabled or disabled. If they are not, and one or more of these are desired, the controls in the Btrfs Assistant's Btrfs maintenance tab can be used to enable them, as an alternative to the systemctl enable <unit-name>.timer command.
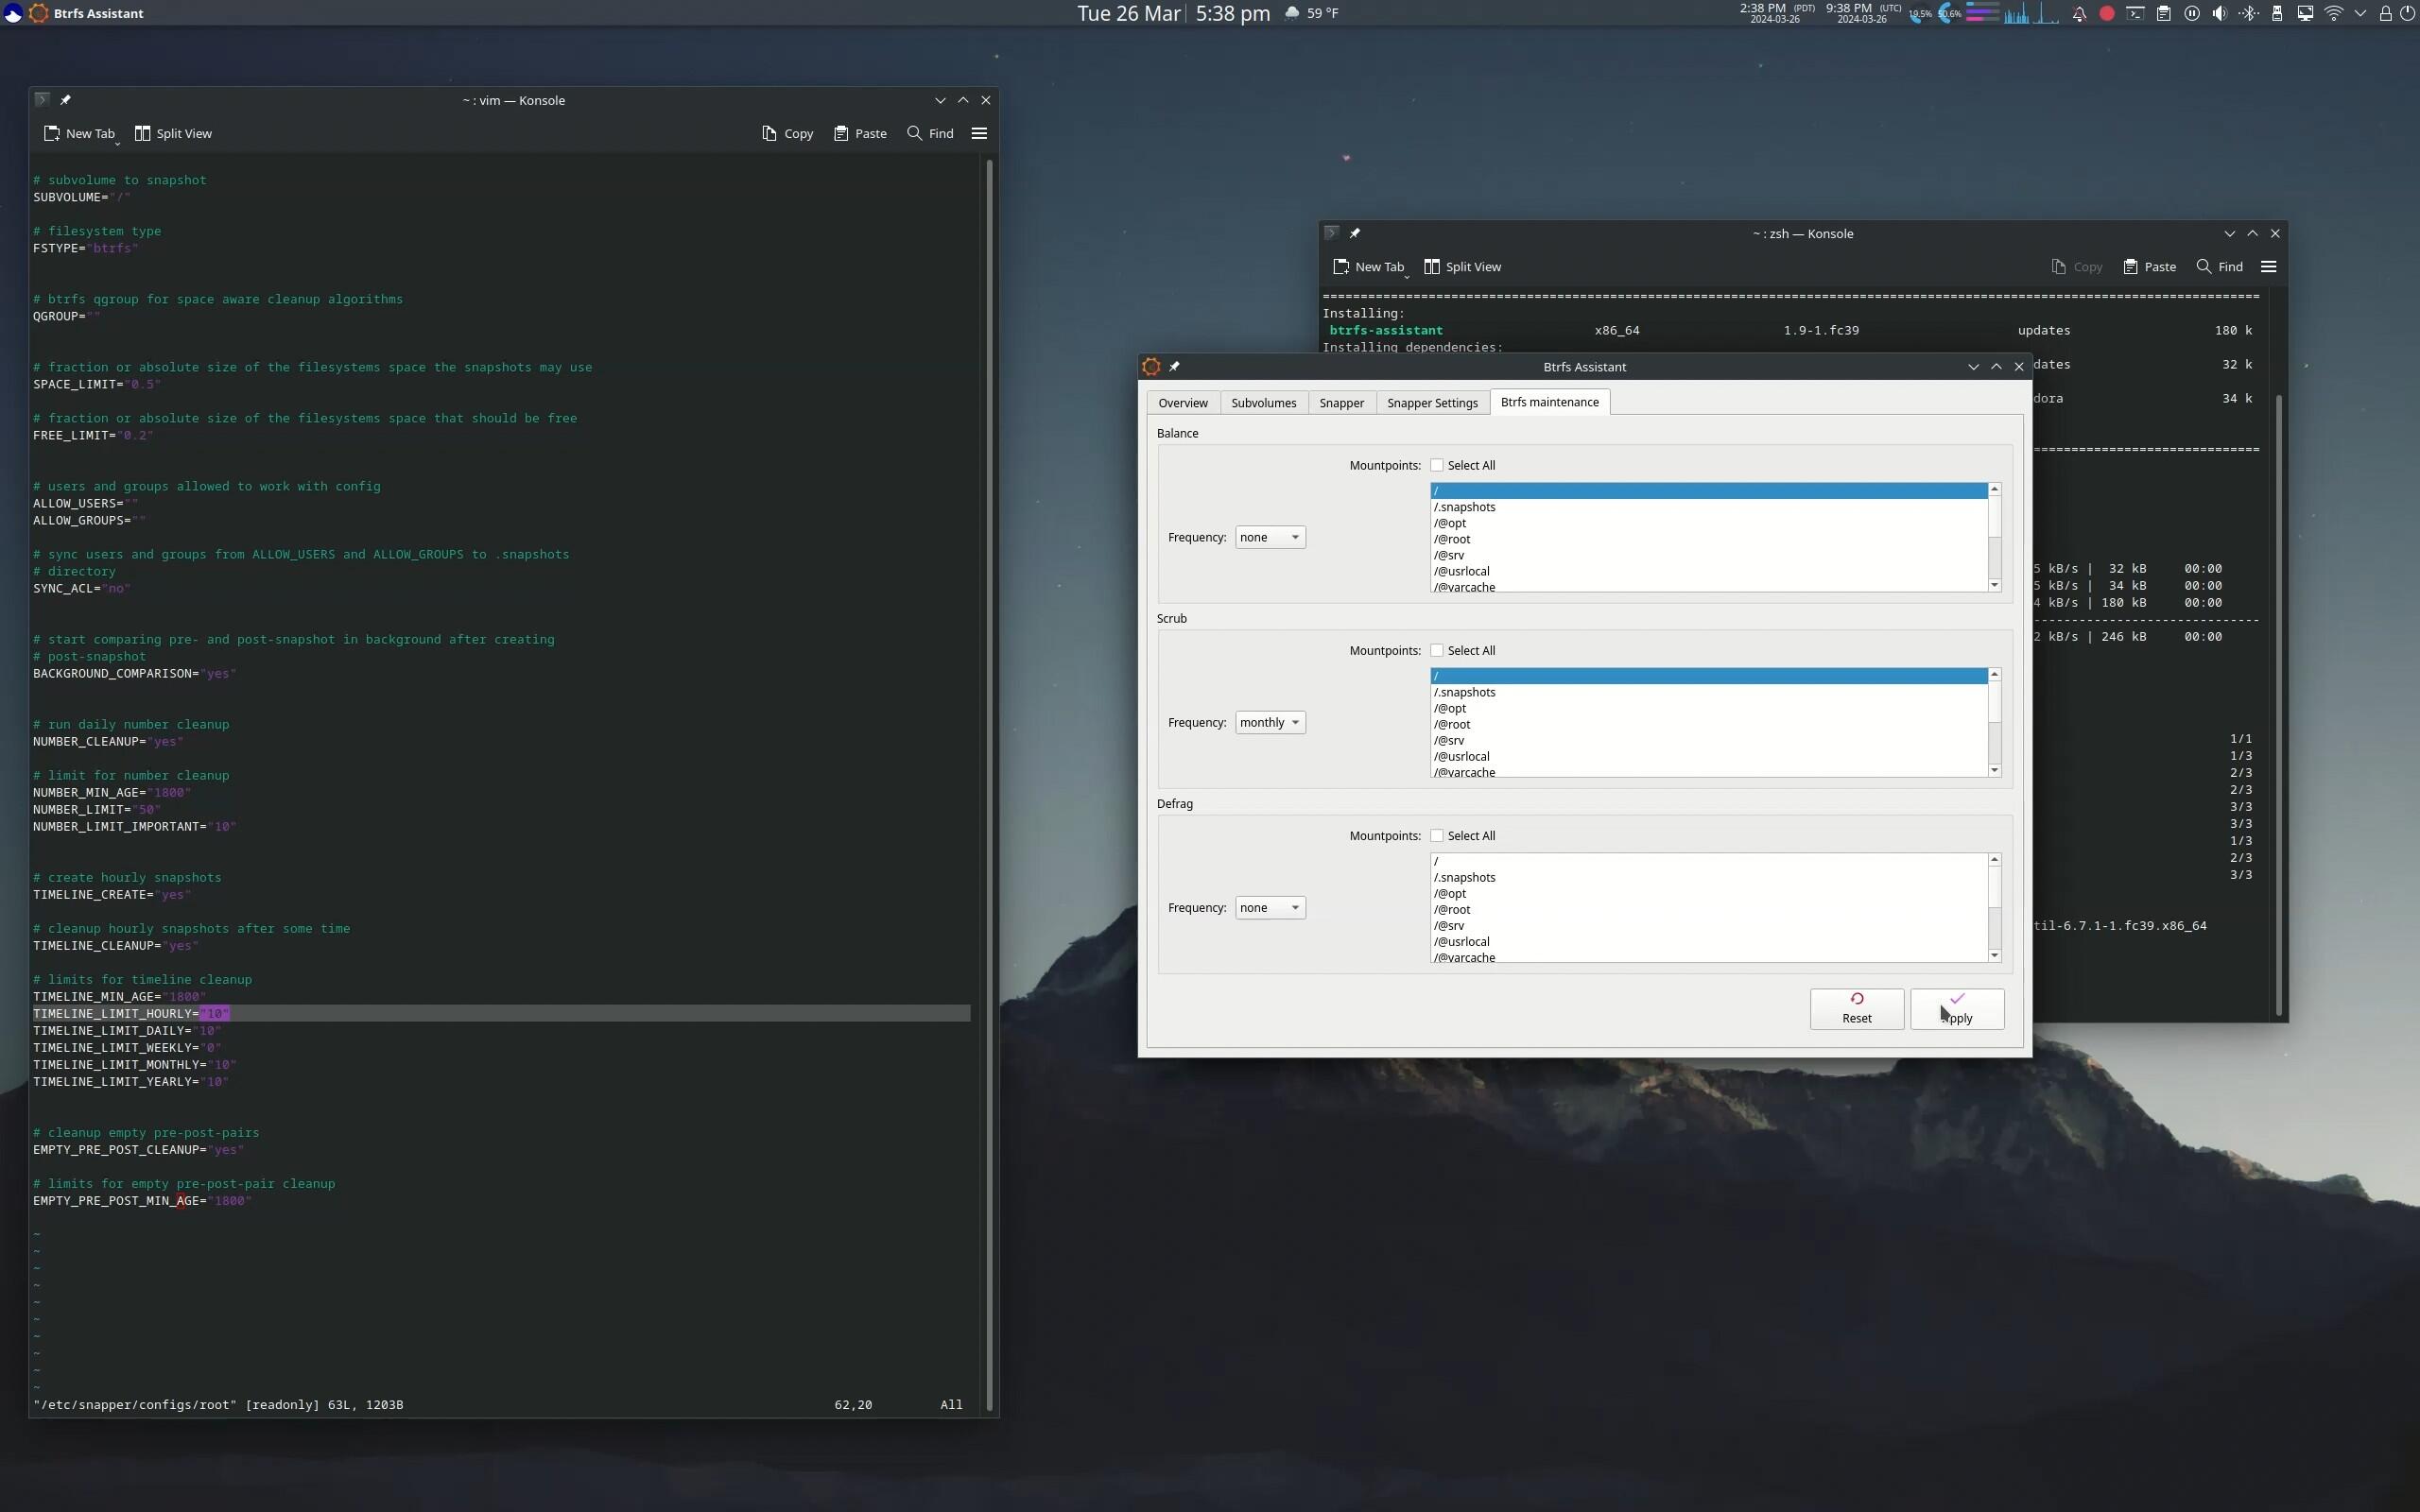 Modifying the Snapper Configuration File Parameters Using the Btrfs Assistant GUI
The timeline cleanup settings and the Btrfs filesystem balancing settings are especially important in that they will help prevent the possibility of suddenly running out of storage space or otherwise making the system unusable. The proper setting of the timeline cleanup will ensure that an excessive amount of old and unuseful snapshots are not needlessly taking storage space. The Btrfs balancing operation is important in avoilding the case where the storage space allocated for the internal operation of the filesystem is not exhausted (see Not Enough Space on Btrfs Filesystem Due to Exhausted Metadata Block Group Allocation fore more on this particular problem).
Conclusion
Booting Issues
A reboot at this point in the process should result in the Fedora (or in this case, the Ultramarine) GRUB menu being displayed. This may not happen for various reasons, from interference with the platform security features and Secure Boot, excessive manipulation of UEFI NVRAM variables with efibootmgr, and excessive manipultion of the EFI partition. In my case, for these reasons, in the course of experimenting to work out the process presented in this article, when rebooting at this stage, I was presented with either a GRUB shell, a boot that stopped immediately after the message XXX was echoed by GRUB, or an error indicating a platform security violation.
If Presented with a GRUB Shell
If presented with a GRUB shell when rebooting at this point in the process, we can boot the installed system from the shell, reinstall the GRUB firmware image, and update the GRUB configuration.
-
Boot from the GRUB shell. The series of commands entered in the shell, described below, are illustrated in the following image.
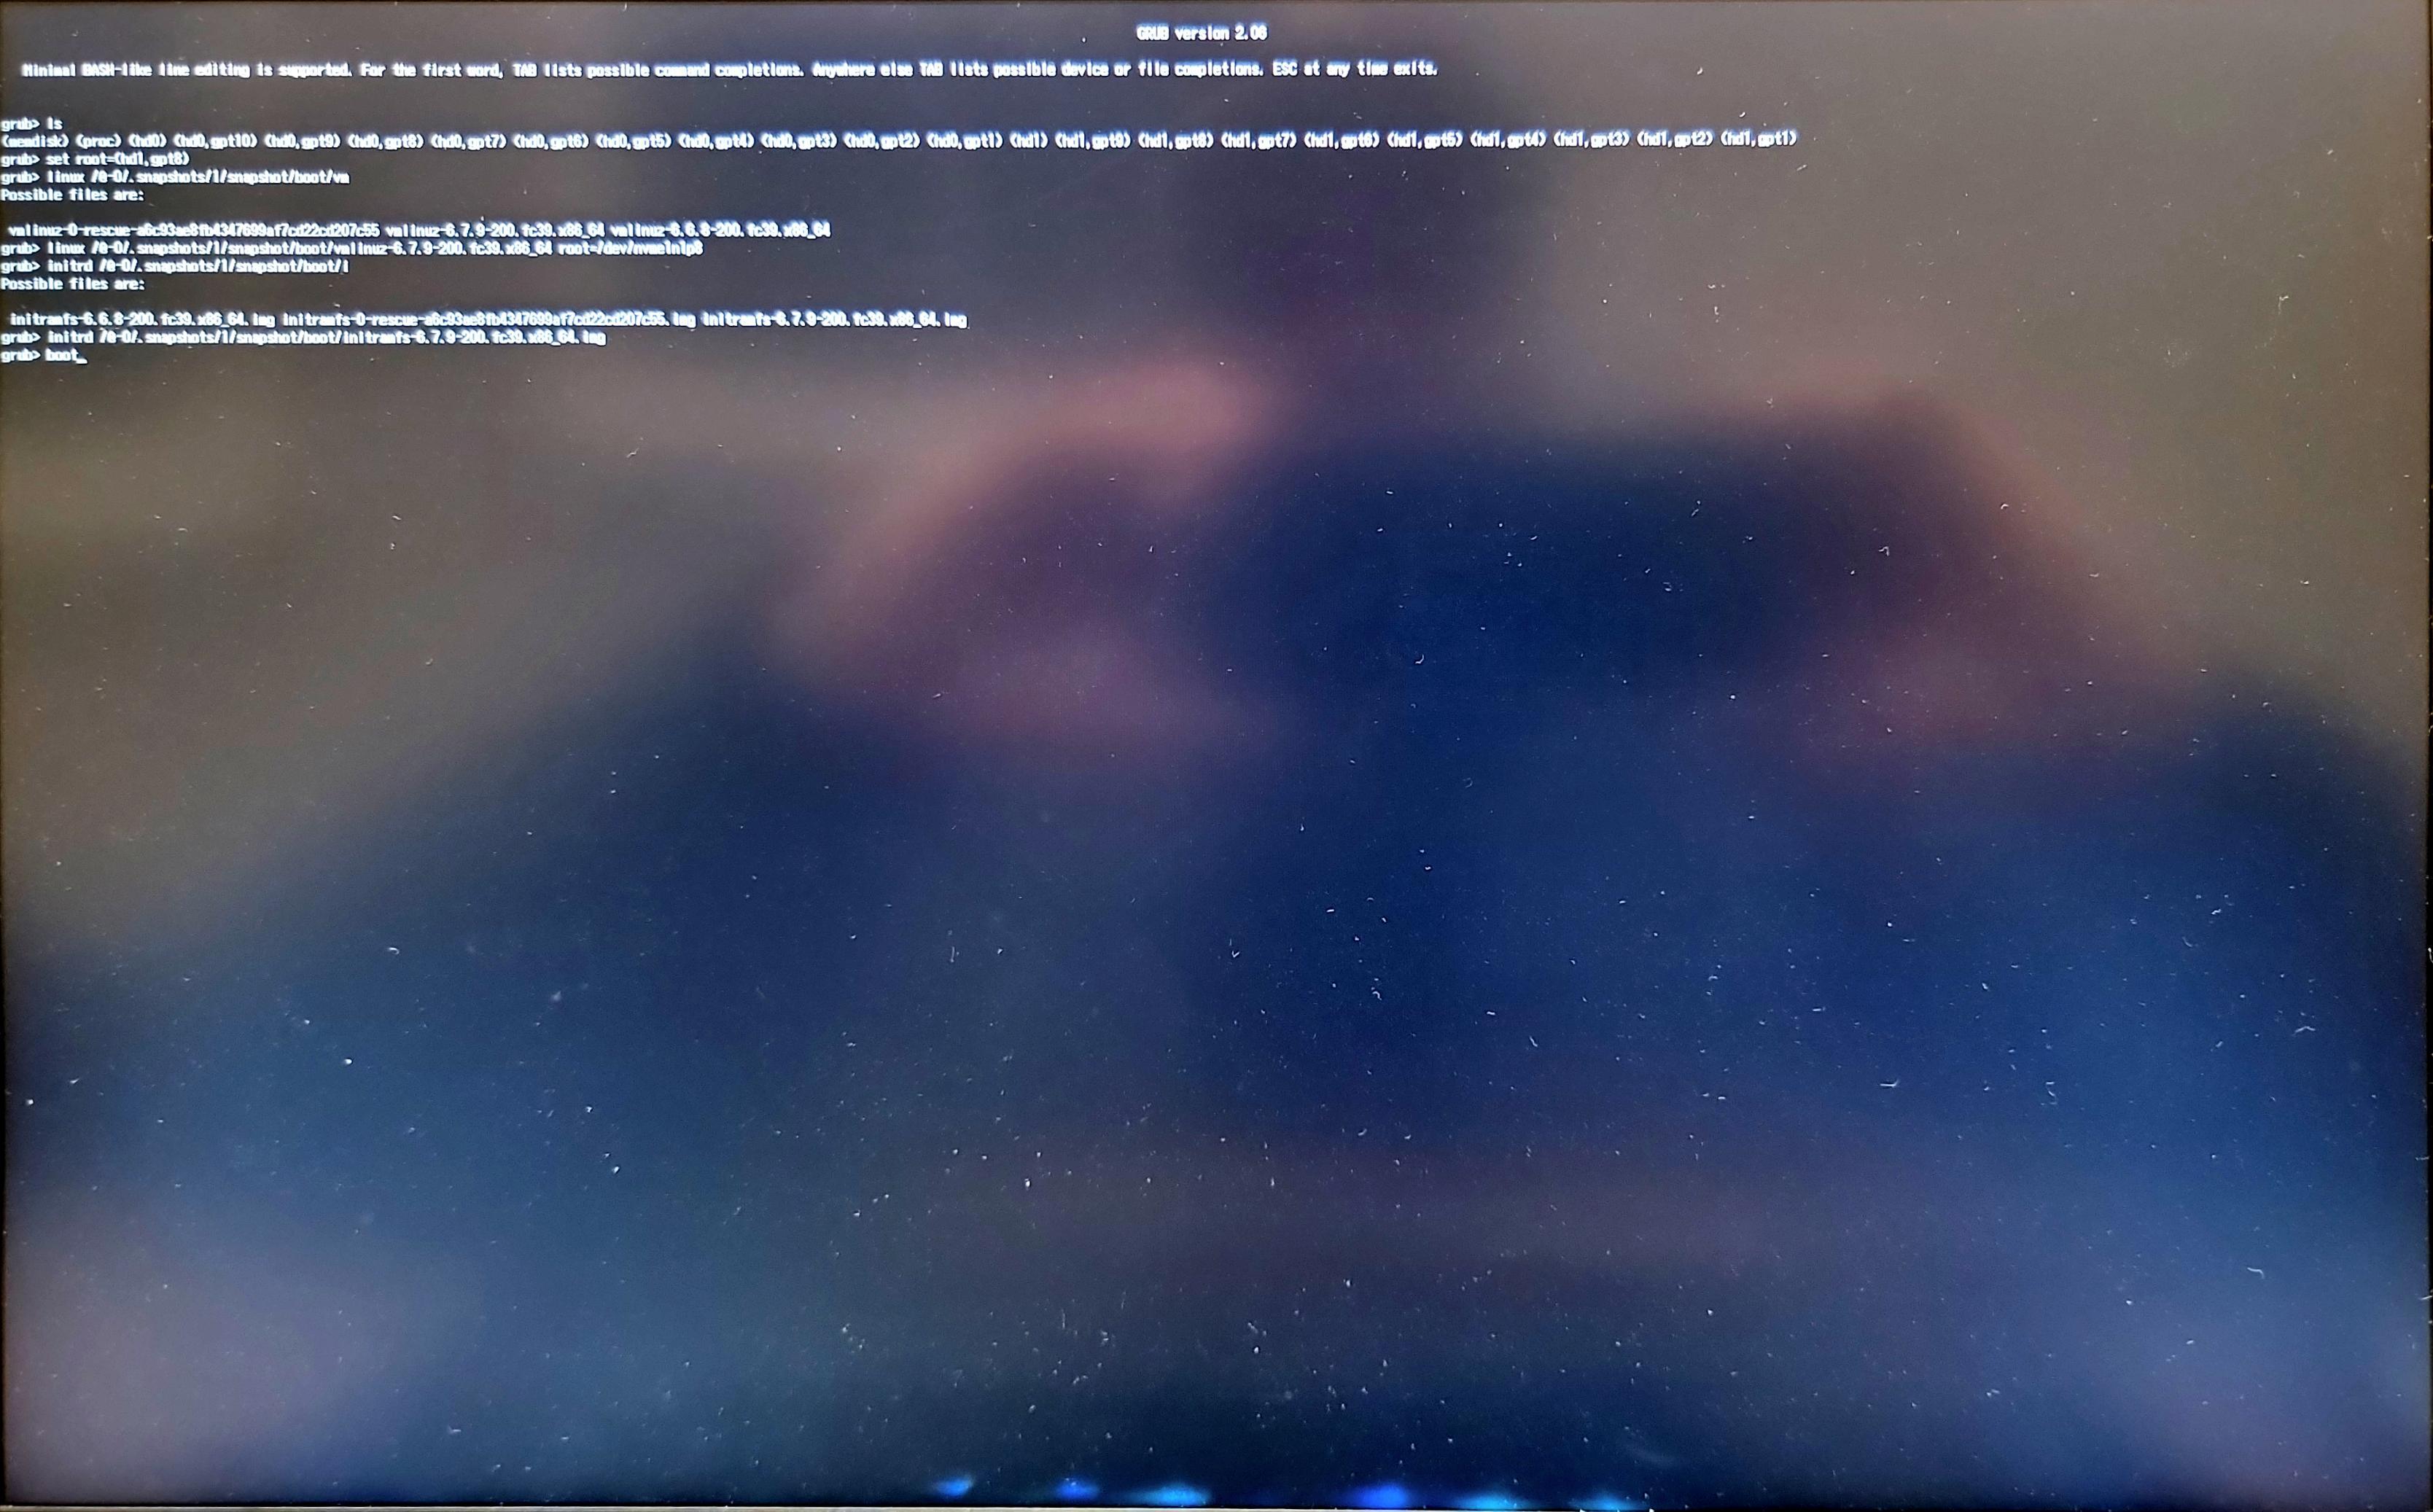 Booting from the GRUB ShellIf there is an issue with the GRUB firmware that prevents booting, it is possible to boot the installed OS from the GRUB shell and the repair GRUB from the running installation.
-
List the devices of which GRUB is aware:
grub> ls
This will putput a space separated list with elements such as (hd1,gpt8). The first component of this couple identifies the disk and the second component identifies the partition. In this case (hd1,gpt8) represents the eighth partition of a GPT partitiond disk on the secondd recognized disk. -
Specify to GRUB which partition contains the root of the OS to be booted.
grub> set root=(hd1,gpt8)
In the system used as the reference for this article, the installation of the root partition, where the Btrfs volume named ULTRAMARINE_ROOT was created, was on the eight partition of the second disk. -
Begin entering the kernel command line. Pressing [TAB] gives possible completions. So entering
grub> linux /@-0/.snapshots/1/snapshot/boot/vm[TAB]
will list the possible completions as shown in the image, above. Enter the full command line:grub >linux /@-0/.snapshots/1/snapshot/boot/vmlinuz-6.7.9-200.fc39.x86_64 root=/dev/nvme1n1p8
The path to the kernel is specified including the subvolume path; the block device which identifies the disk and partition is also specifed as the value of the parameter root. -
Begin entering the command to load the initial RAM disk. Pressing [TAB] will give possible completions, as above. So entering:
grub> initrd /@-0/.snapshots/1/snapshot/boot/i[TAB}
will list the available initial RAM disk files. Enter the full command, specifying an initrd with a version that matches the kerenl version specified in the previous step.grub> initrd /@-0/.snapshots/1/snapshot/boot/initramfs-6.7.9-200.fc39.x86_64.img
-
Issue the boot command.
grub> boot
The Fedora installation should boot as normal.
-
List the devices of which GRUB is aware:
-
Reinstall the packages grub2-efi, grub2-efi-modules, shim as shown in the first image of the following set.
sudo dnf reinstall grub2-efi grub2-efi-modules shim
This will write the GRUB firmware application in the Fedora ESP/EFI directory and write the appropriate values to the UEFI NVRAM that point to the GRUB firmware application in the Fedora ESP/EFI directory. -
Update the GRUB configuration, as shown in the second image of the following set.
sudo grub2-mkconfig -o /boot/grub2/grub.cfg
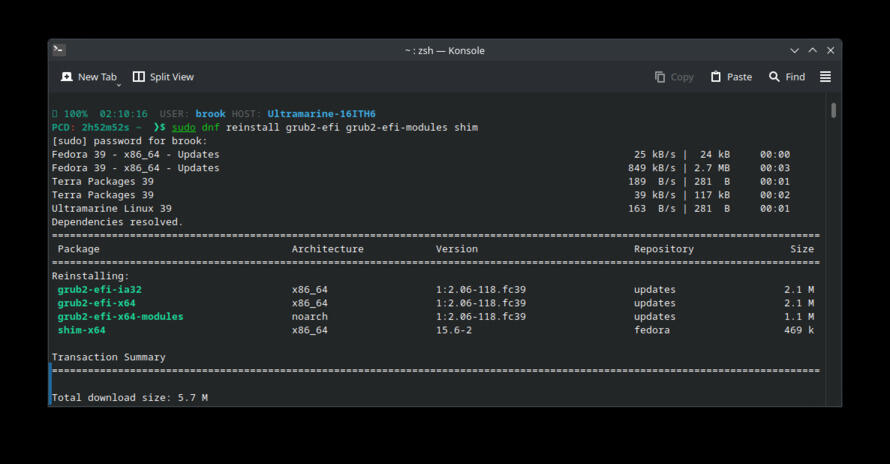
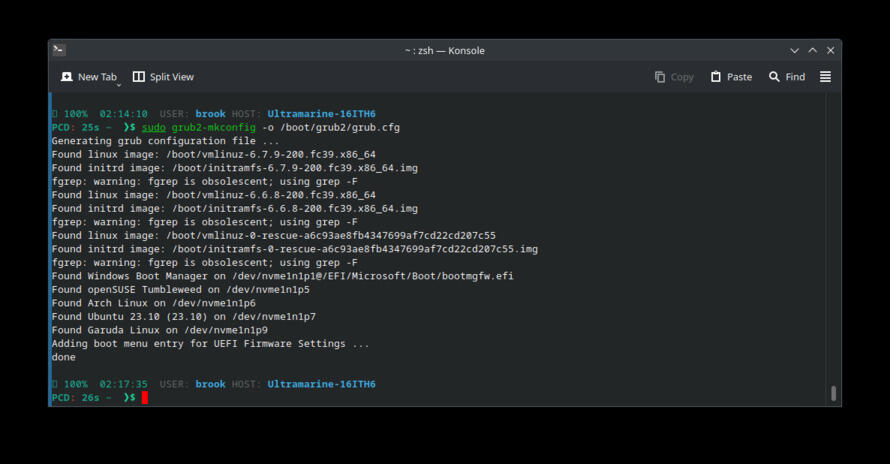
Repairing GRUB by Reinstalling GRUB Packages and Updating GRUB Configuration
If Presented with a Platform Security Error
If presented with an error indicating a problem with platform security or a platform security policy violation, all that is required is to disable secure boot and/or reset the security keys.
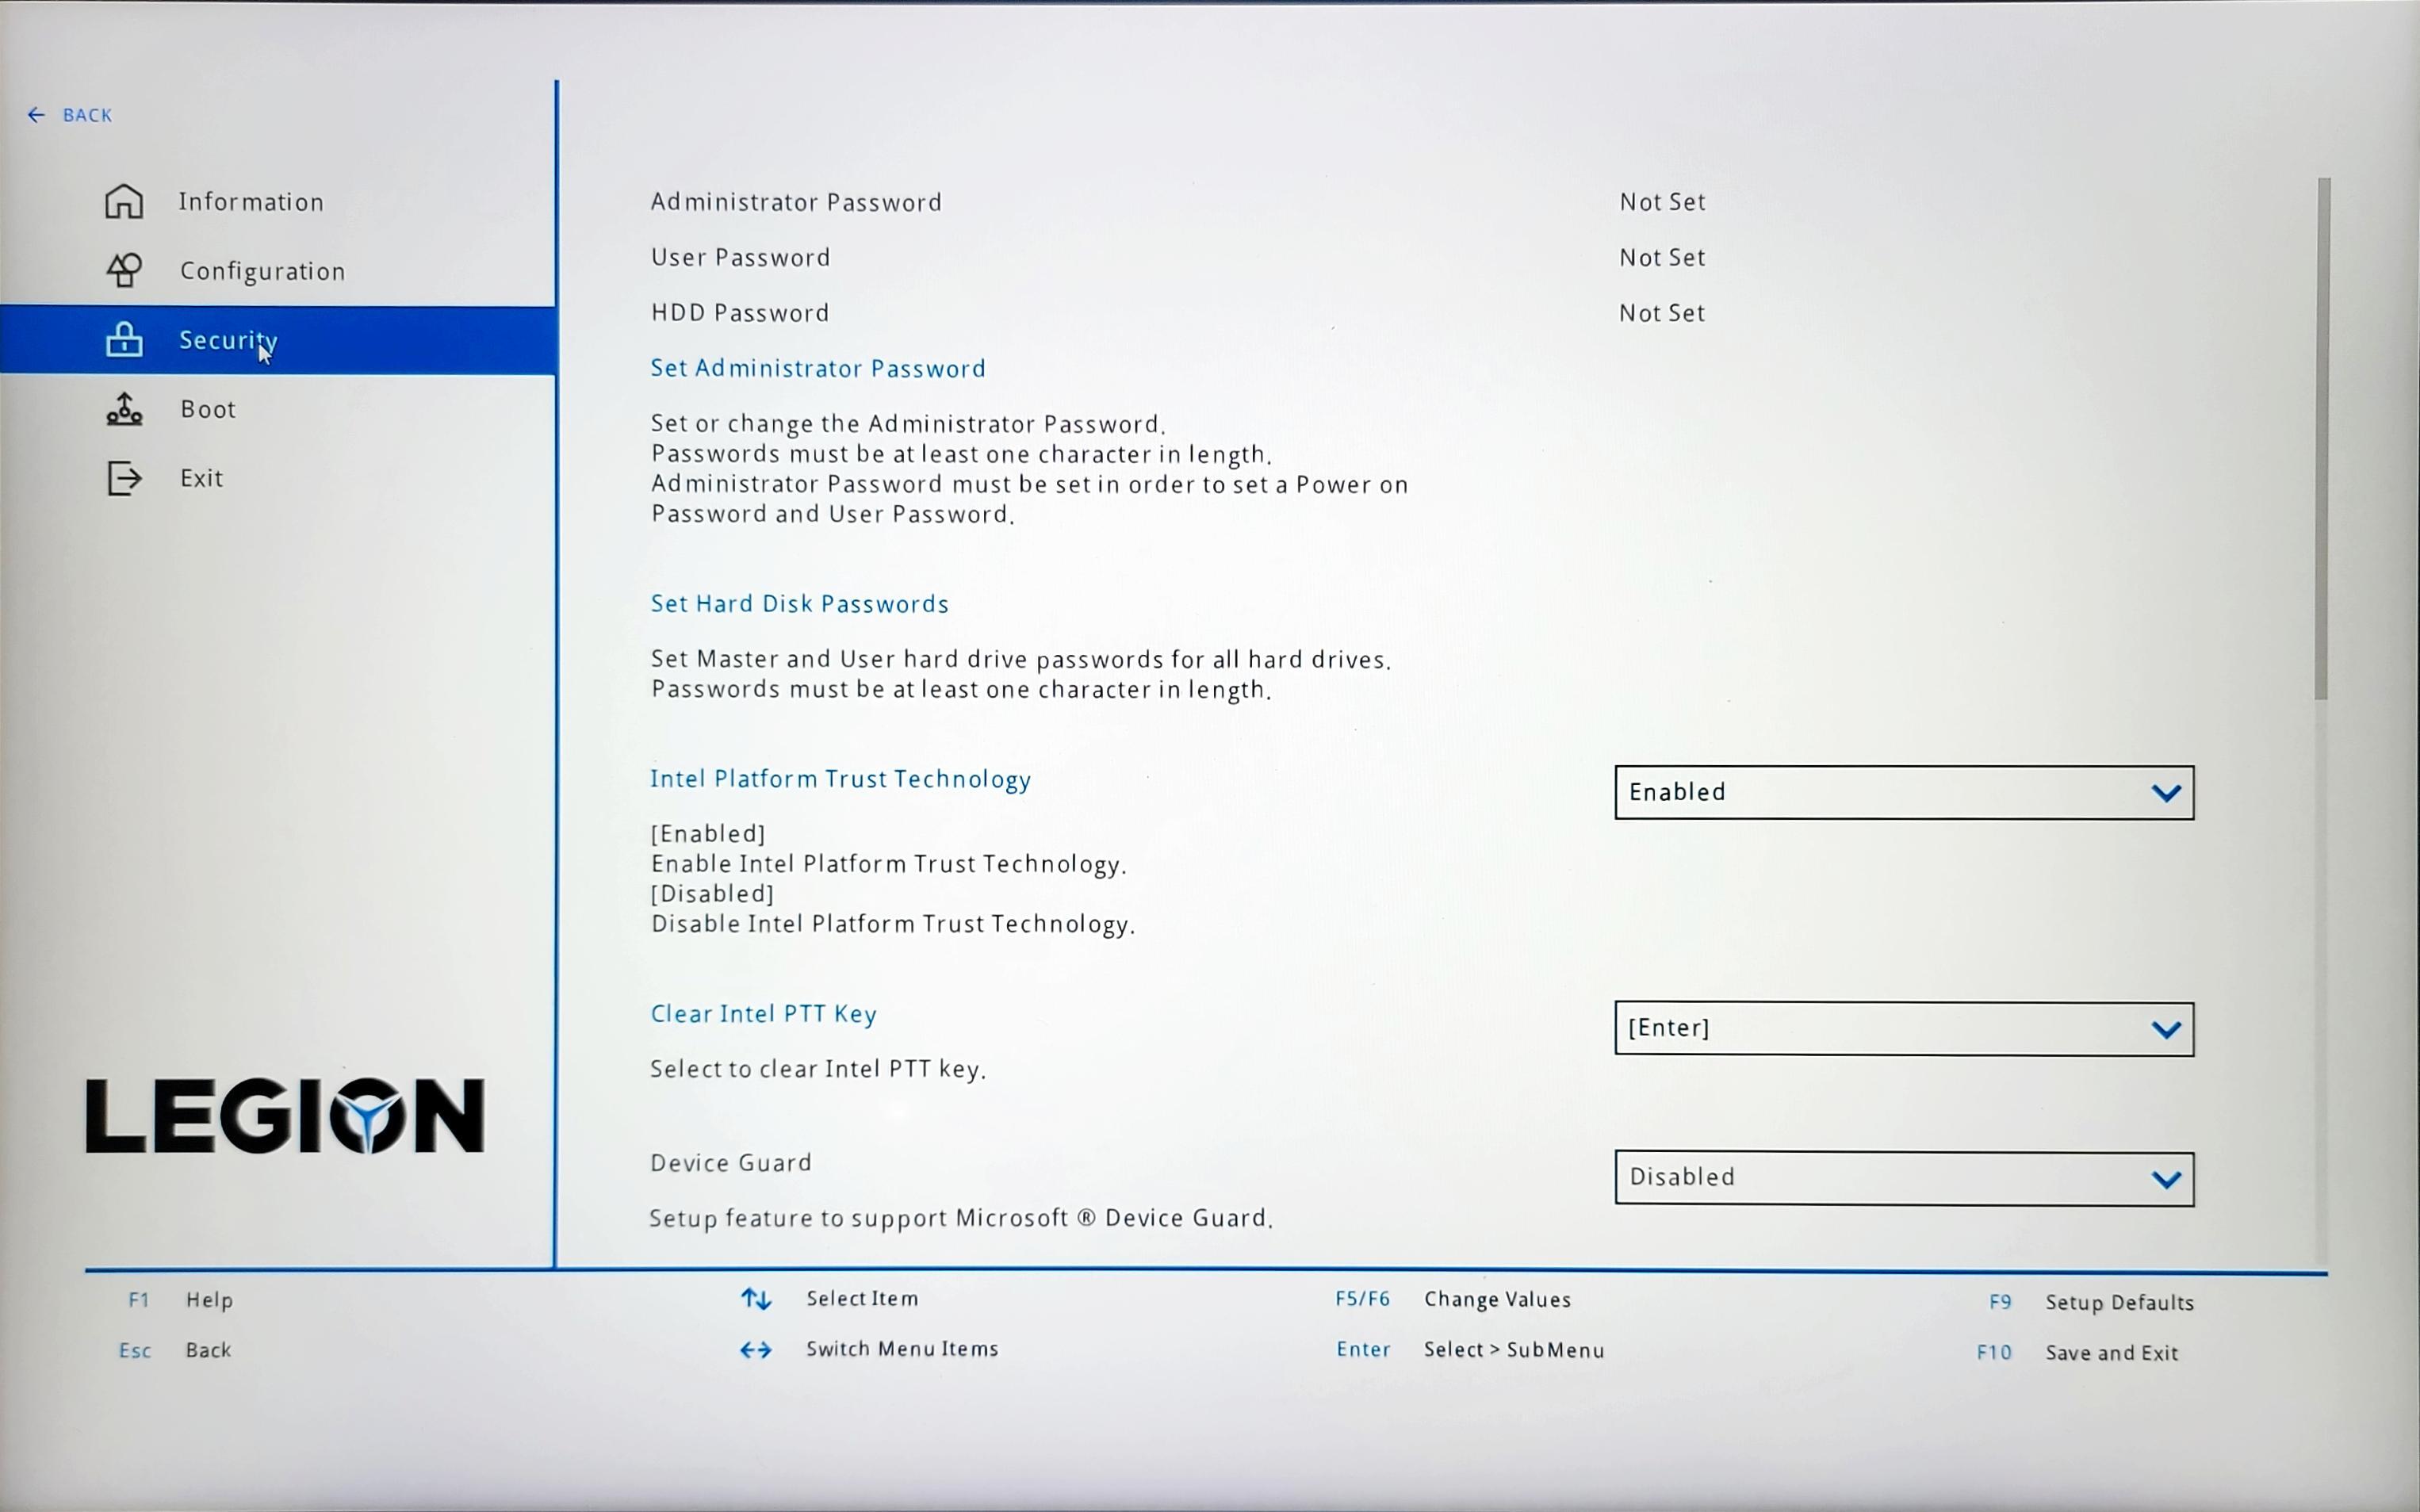
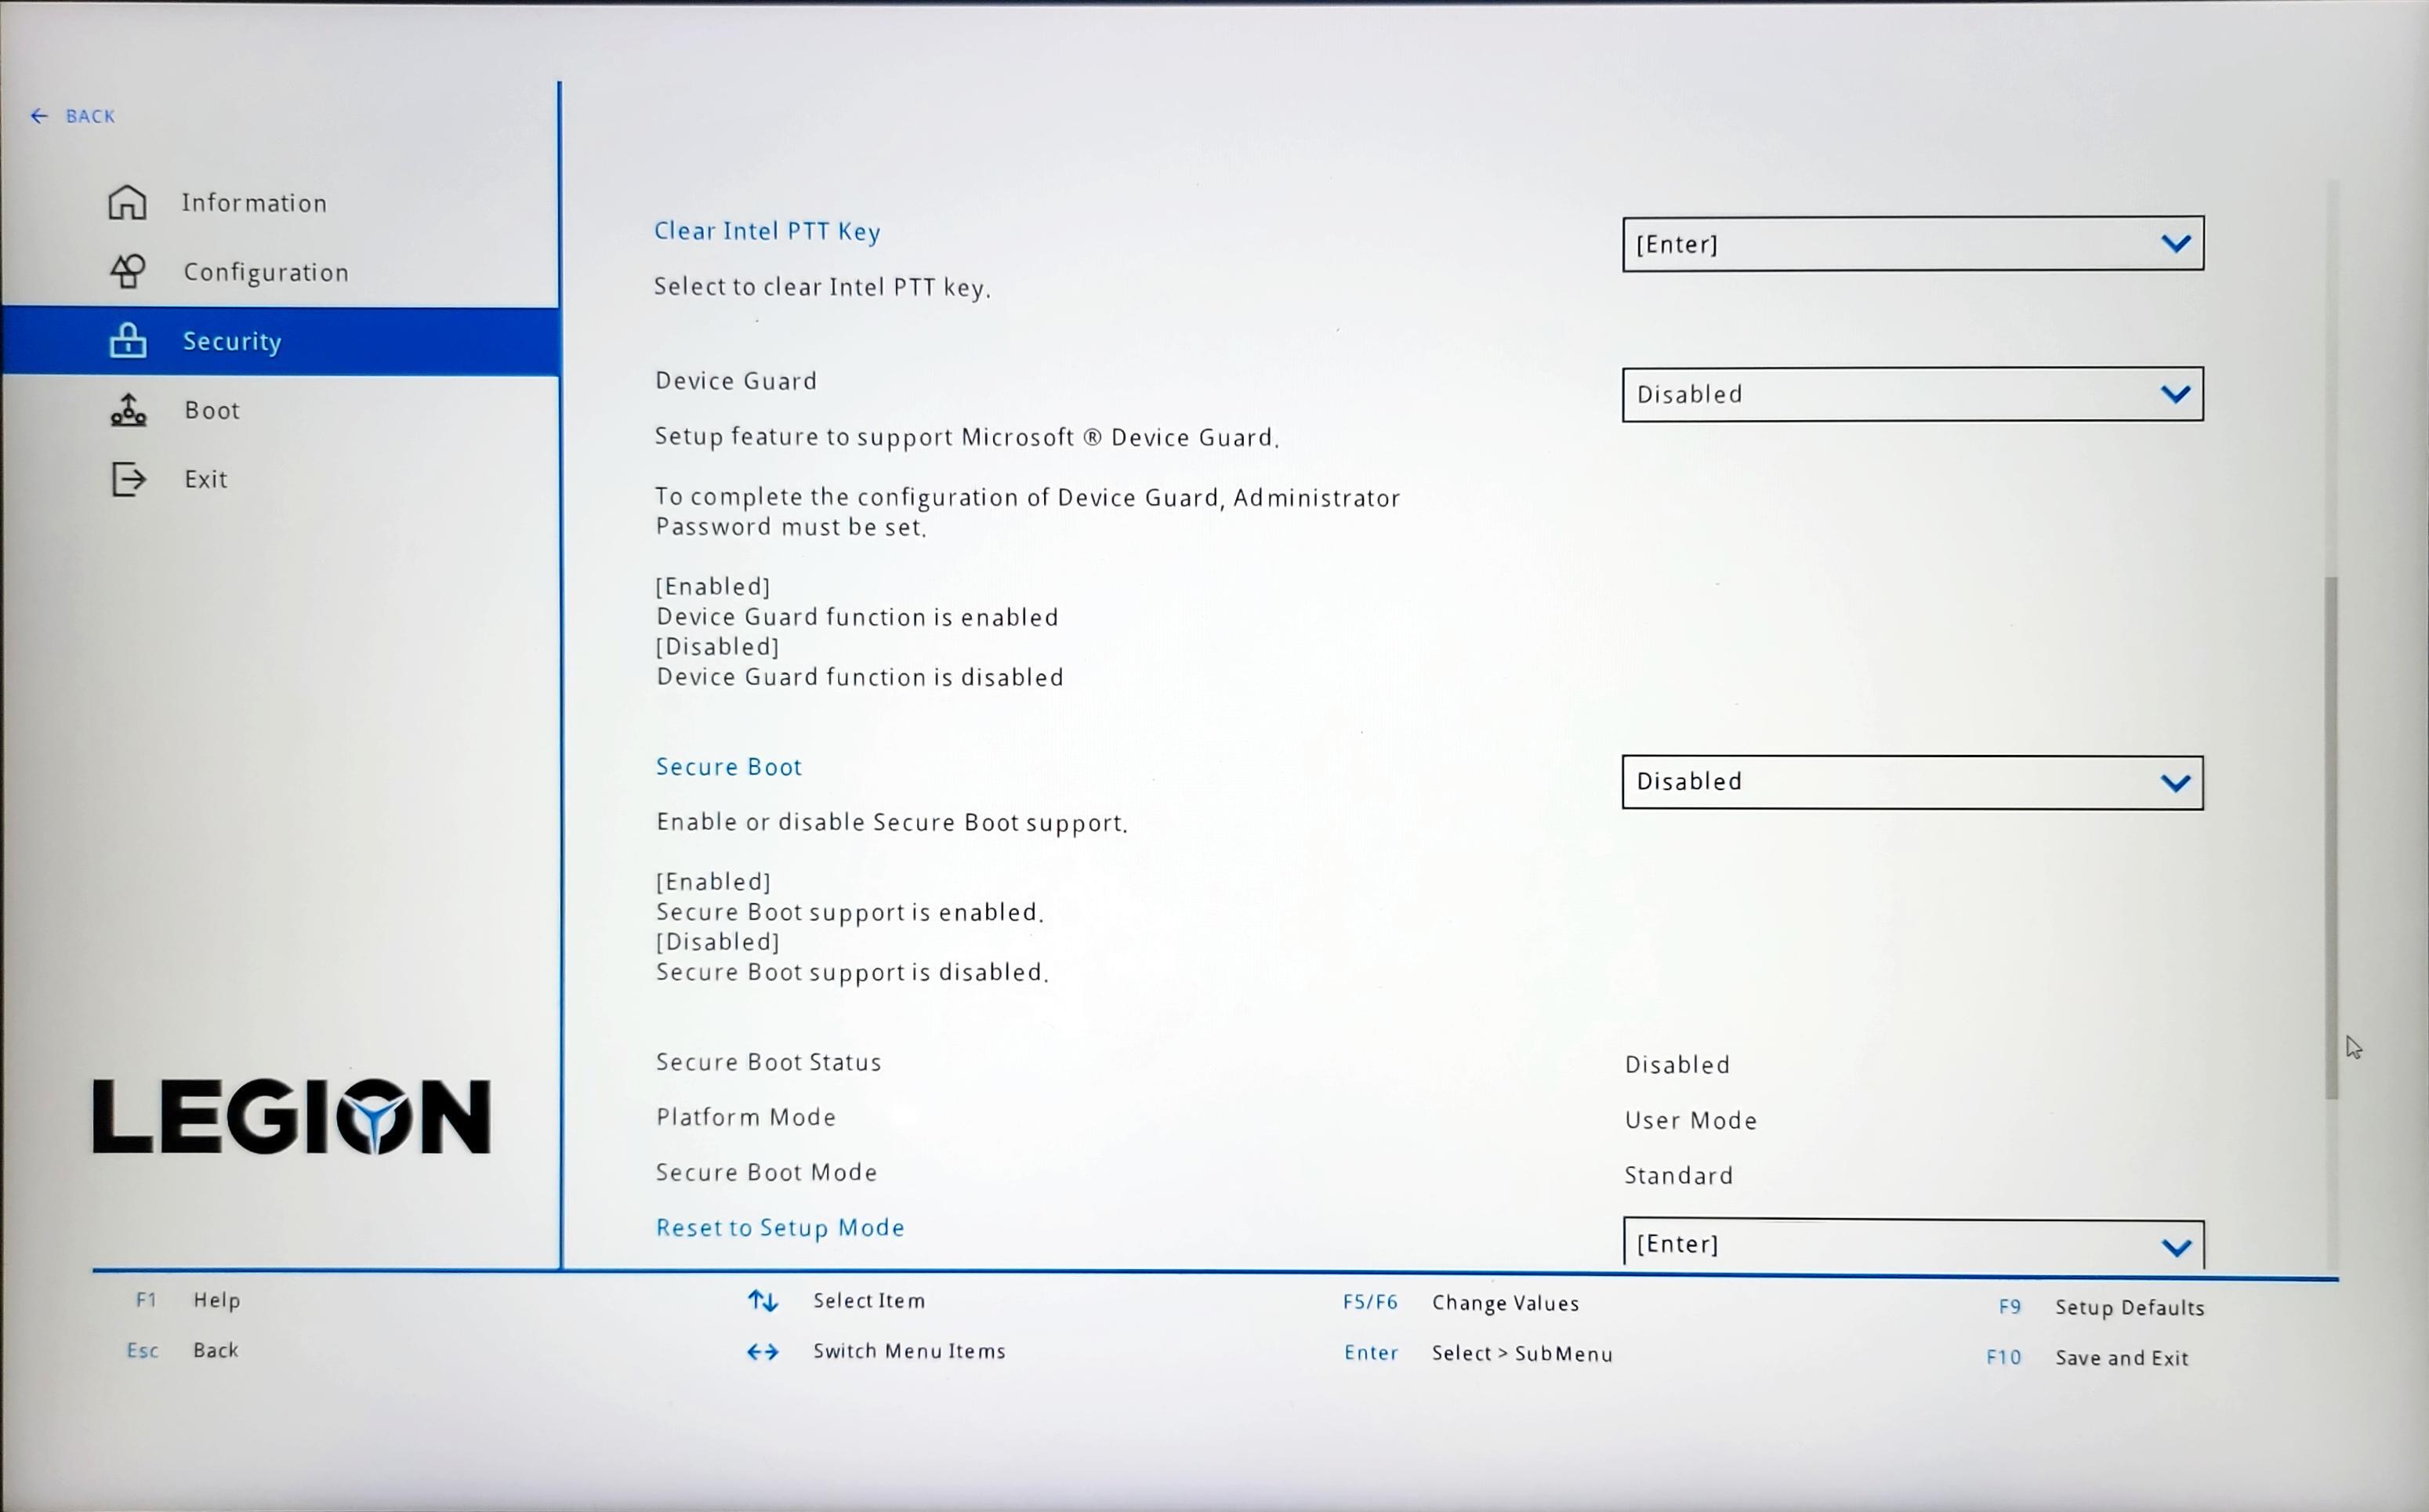
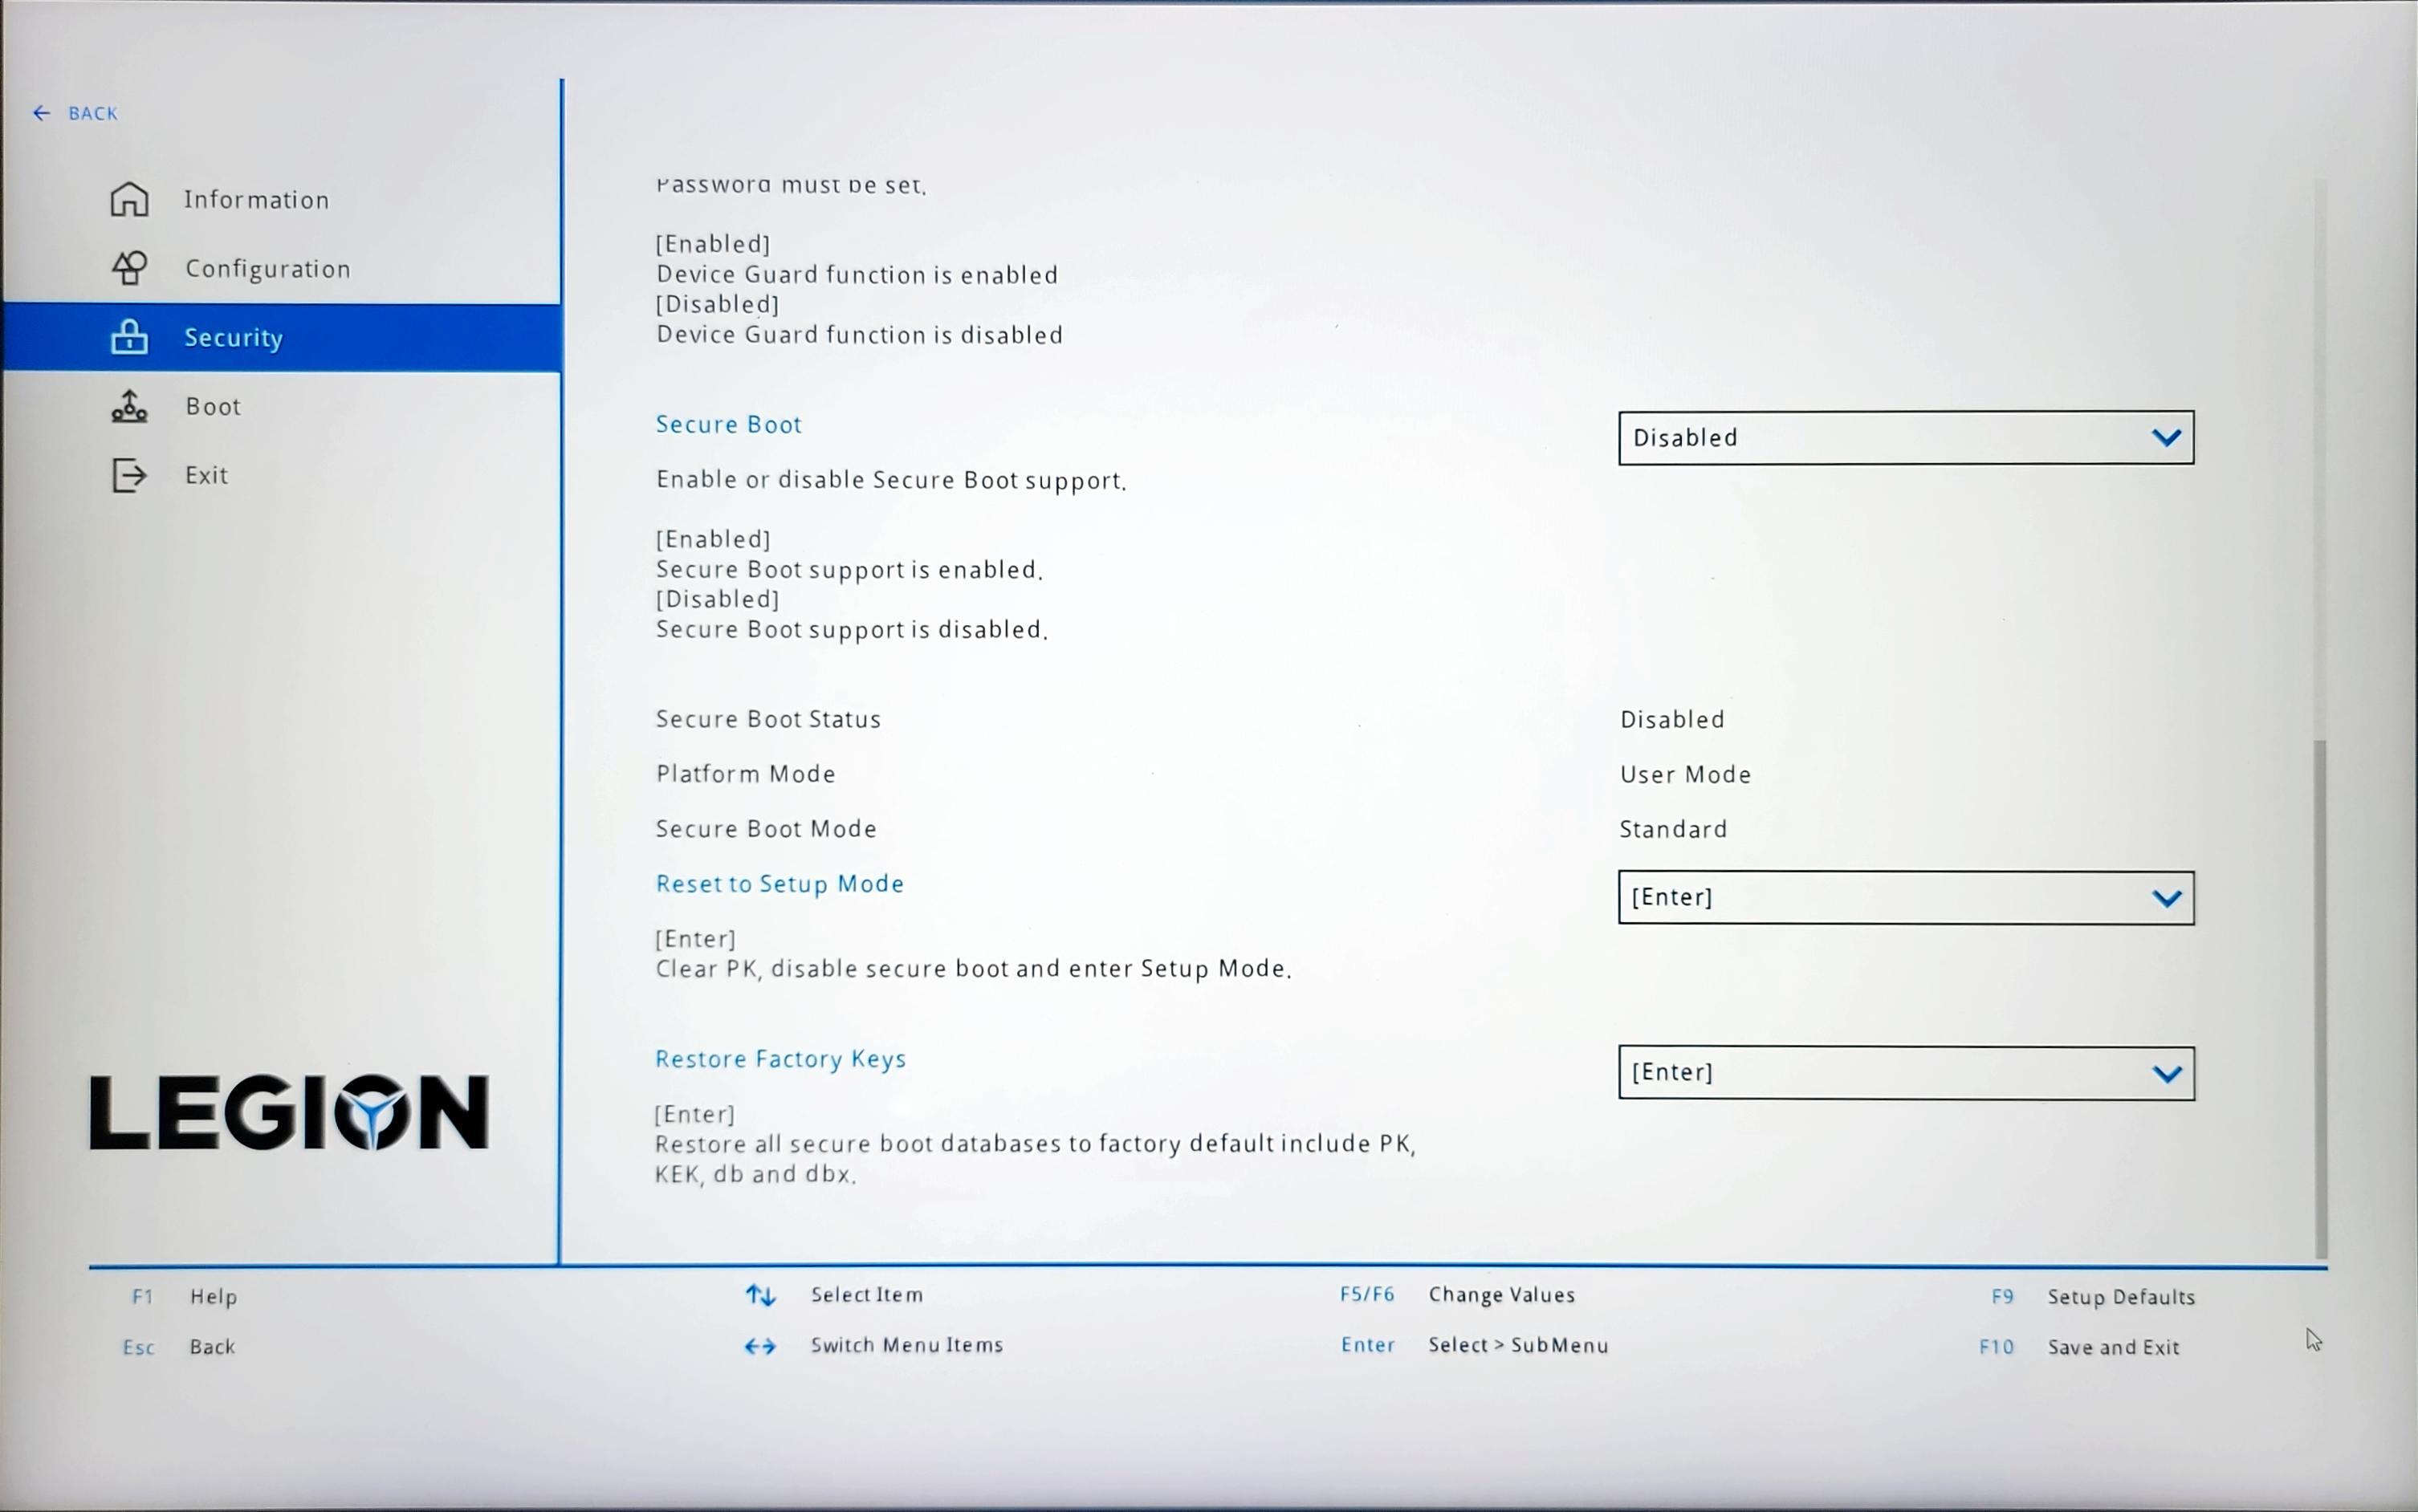
Lenovo Legion 5i Pro Firmware Interface Security Settings
The firmware interface is used to disable Secure Boot and reset.
If Fedora GRUB EFI Application Is Not in List of Available Boot Loader
Use Firmware Interface to Register Fedora's GRUB EFI Loader
GRUB written to ESP but firmware NVRAM has not been updated.
If the computer that is the target of the installation has a firmware interface that allows registering a firmware application that the interface can access, it can be used to register the application to the NVRAM. One of the laptops used as the reference for this article, the Dell G5 has a very advanced firmware interface in which an entry could be created for the platform firmware boot manager. Two of the relevant screens for this process are shown in the following set of images.
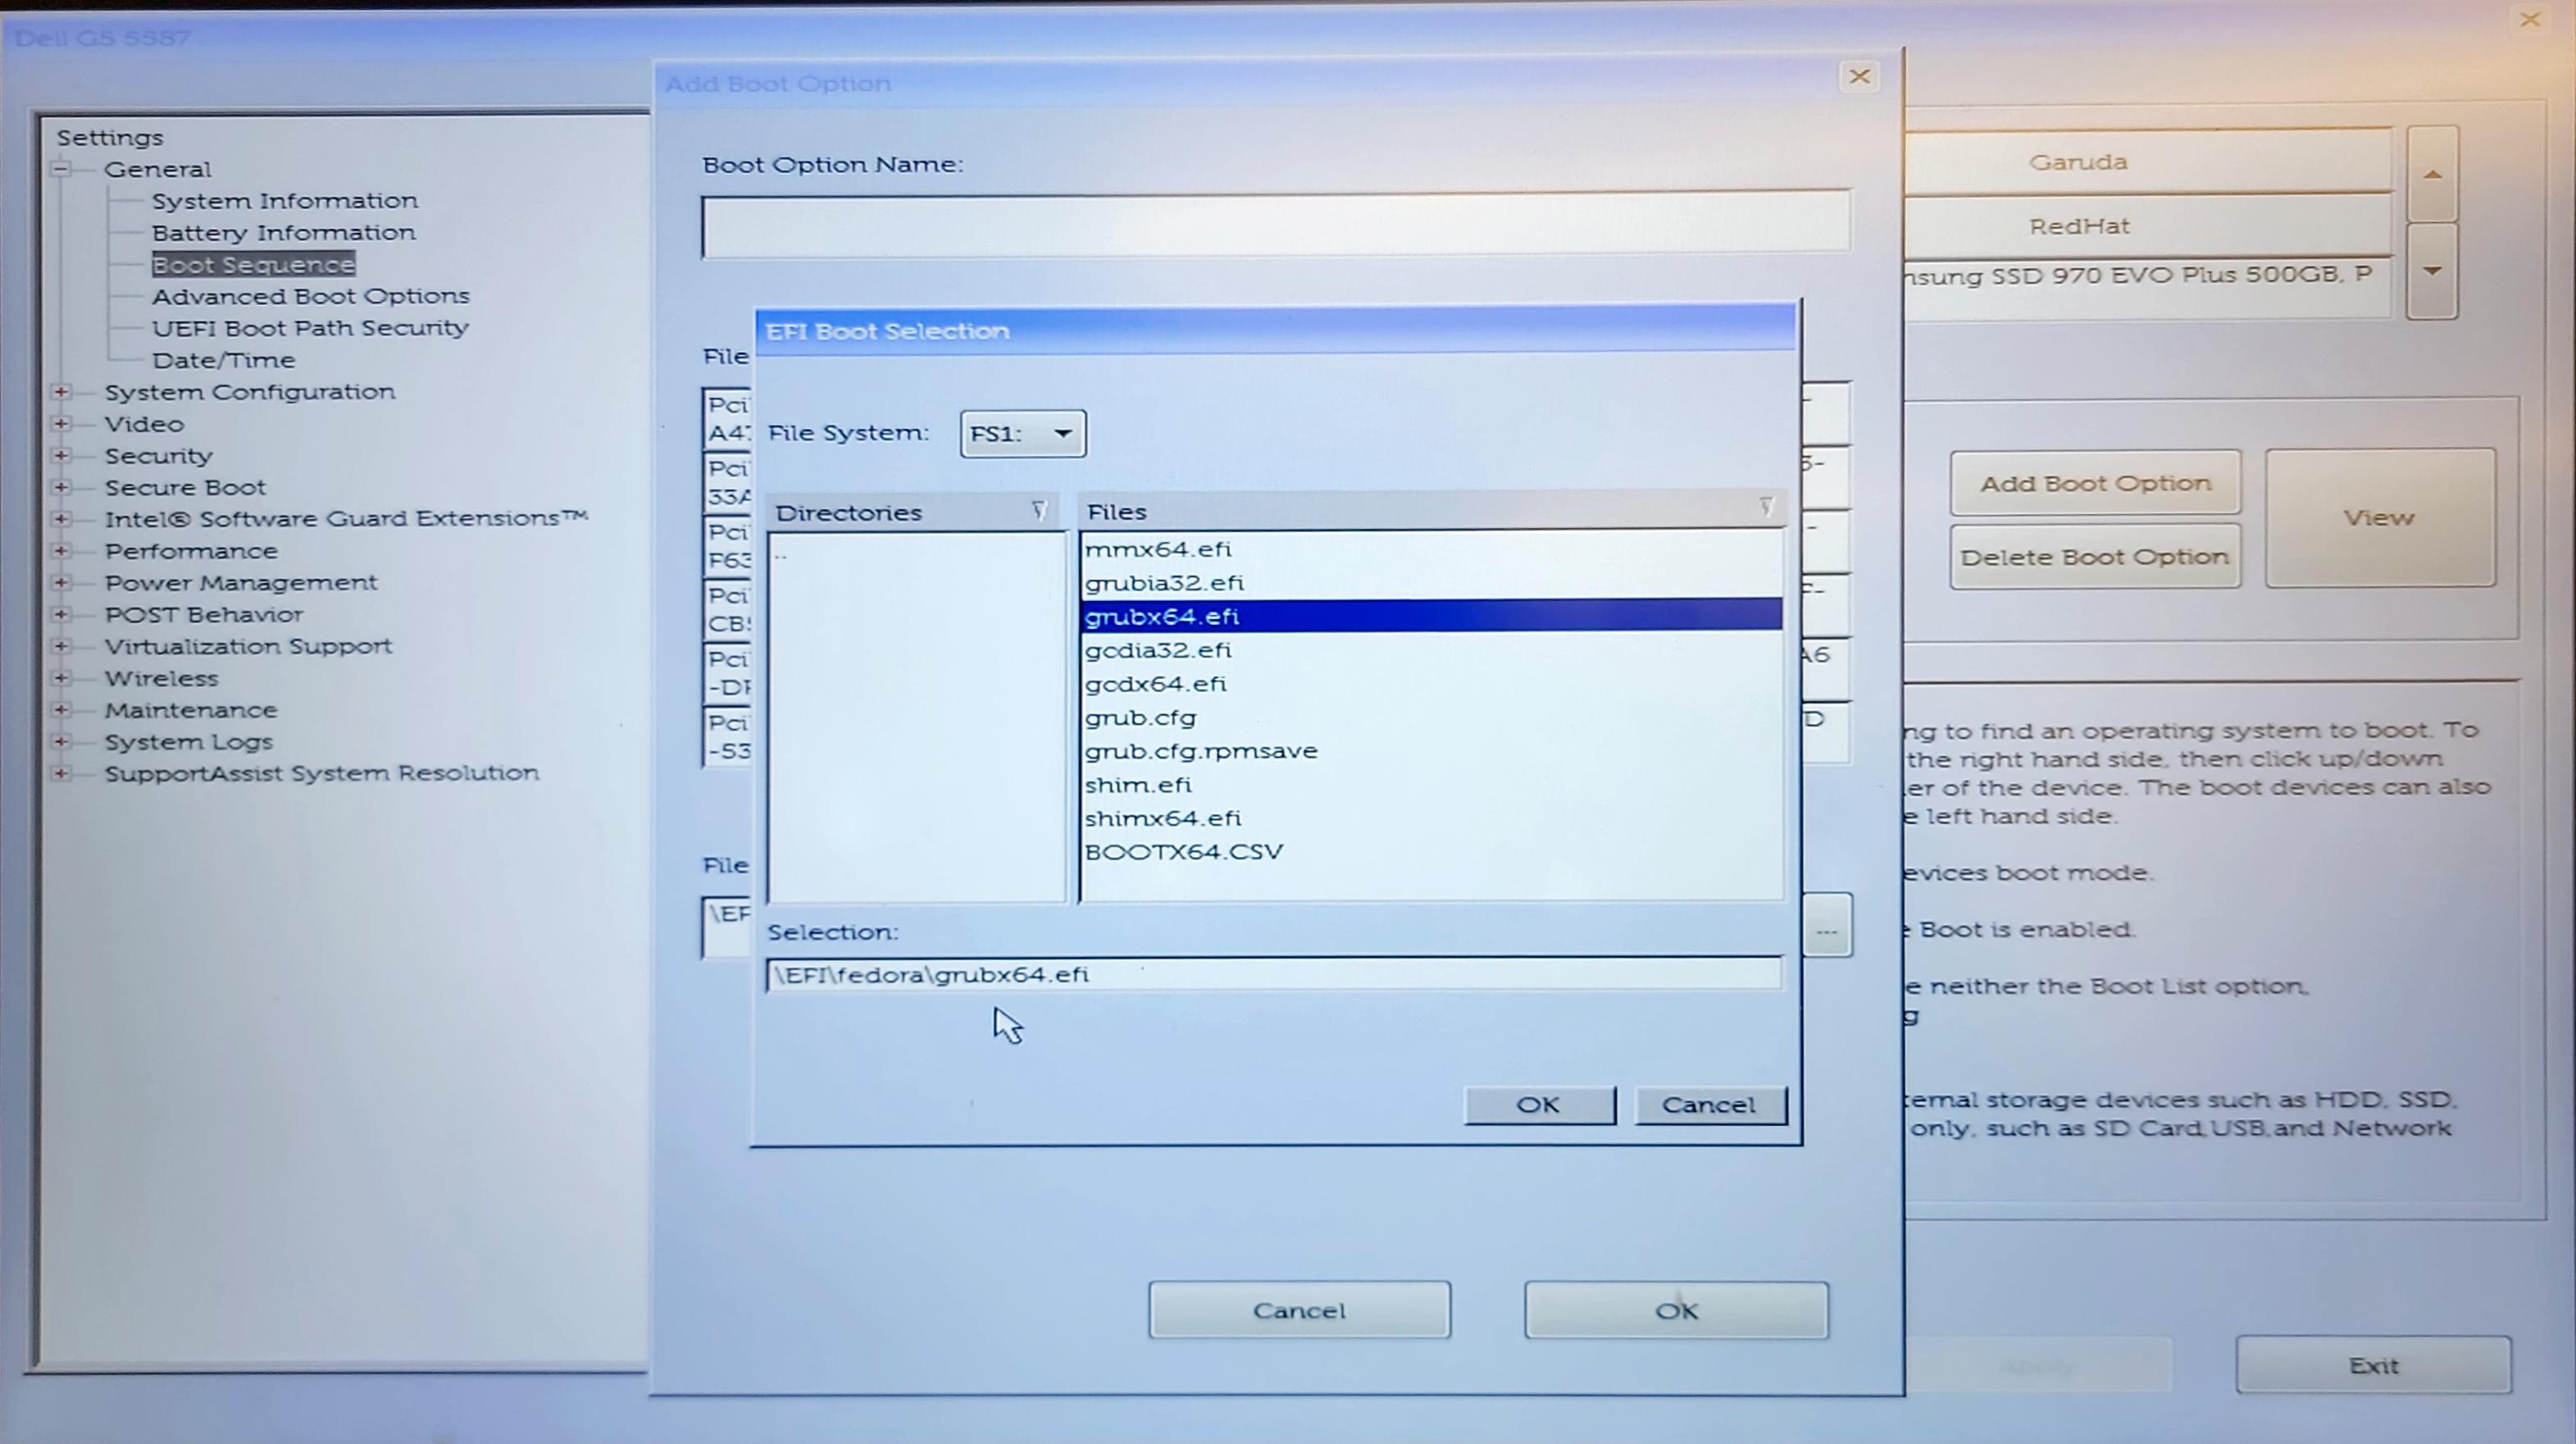
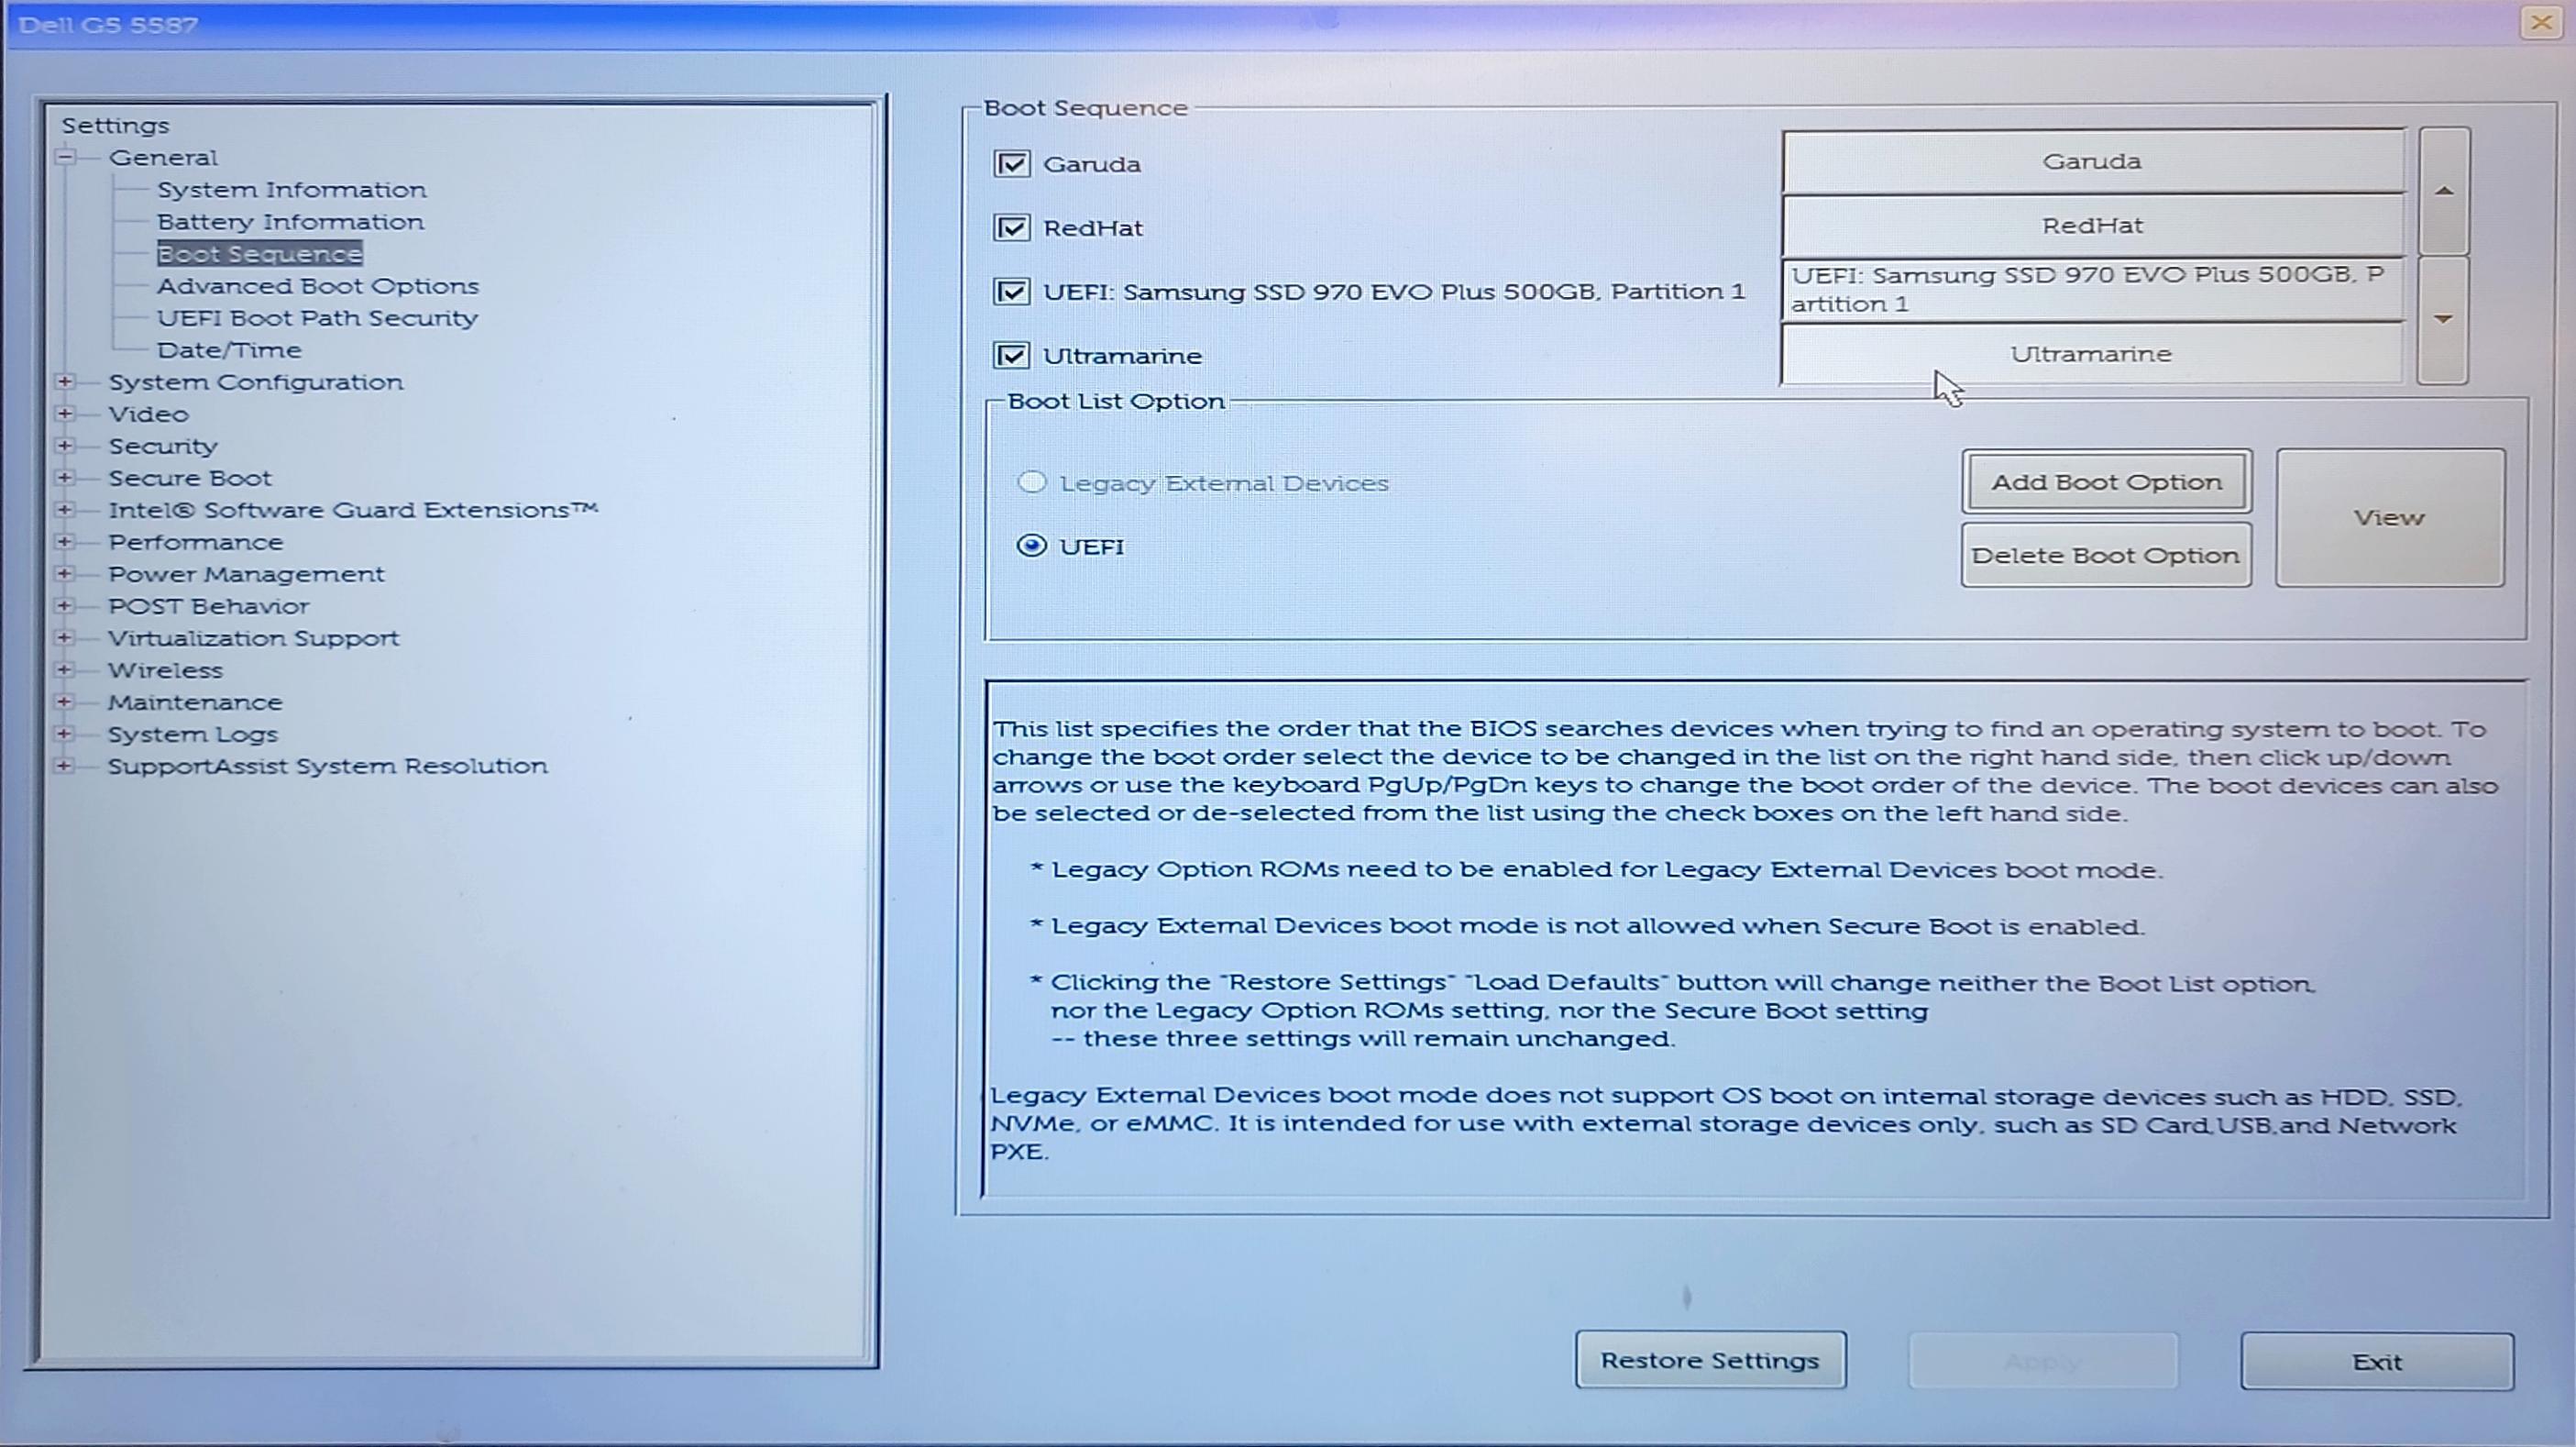
Using the Dell G5's Firmware Interface to Register the Fedora (Ultramarine) GRUB EFI Image
The first image shows the selection of the firmware image after navigating to it. The second image shows the entry in the boot sequence after registering the Fedora (Ultramarine} GRUB UEFI image.
chroot into Installed System from Live ISO Environment and Re-Install GRUB Packages
Another option, is to boot into the live ISO environment, chroot into the isntalled system and repair GRUB. The process below will re-write the GRUB firmware application to the ESP and write variable values to the firmware NVRAM that point to the firmware application in the ESP.
- Reboot into live ISO environment.
- chroot into installed system, in the same way as in Part 8, above.
- Reinstall the packages grub2-efi. grub2-efi-modules, and shim as described above in If Presented with a GRUB Shell.
- Update GRUB with grub2-mkconfig as above.
If Boot Hangs After GRUB Displays 'Loading Linux Kernel 6. ....
References
- Creating openSUSE-style btrfs root partition & subvolumes
- An Arch Linux Installation on a Btrfs Filesystem with Snapper for System Snapshots and Rollbacks
- Red Hat Knowledge Base: What is GRUB_ENABLE_BLSCFG in /etc/default/grub?
- Reddit Thread: [!!!!!!]failed to allocate manager object
- Dedora Quick Docs: Changing SELinux States and Modes
- serverfault thread: selinux in a chroot environment
- GitHub Repository: Antynea/grub-btrfs
- Unified Extensible Firmware Interface (UEFI) Specification, Release 2.10 (PDF)